Tuesday 31 January 2017

#makenine2017

There's been a huge buzz over on instagram about the #makenine2017. Basically this idea involves you picking 9 things your going to make over 2017.  Now I am a bit late to the party but its mainly because I had such a hard time choosing things I would definitely force myself to make! Being a fly by the seat of your pants sort of human I tend to just go with the flow. 

So without further ado here's the final nine things that I will definitely try and make in 2017!


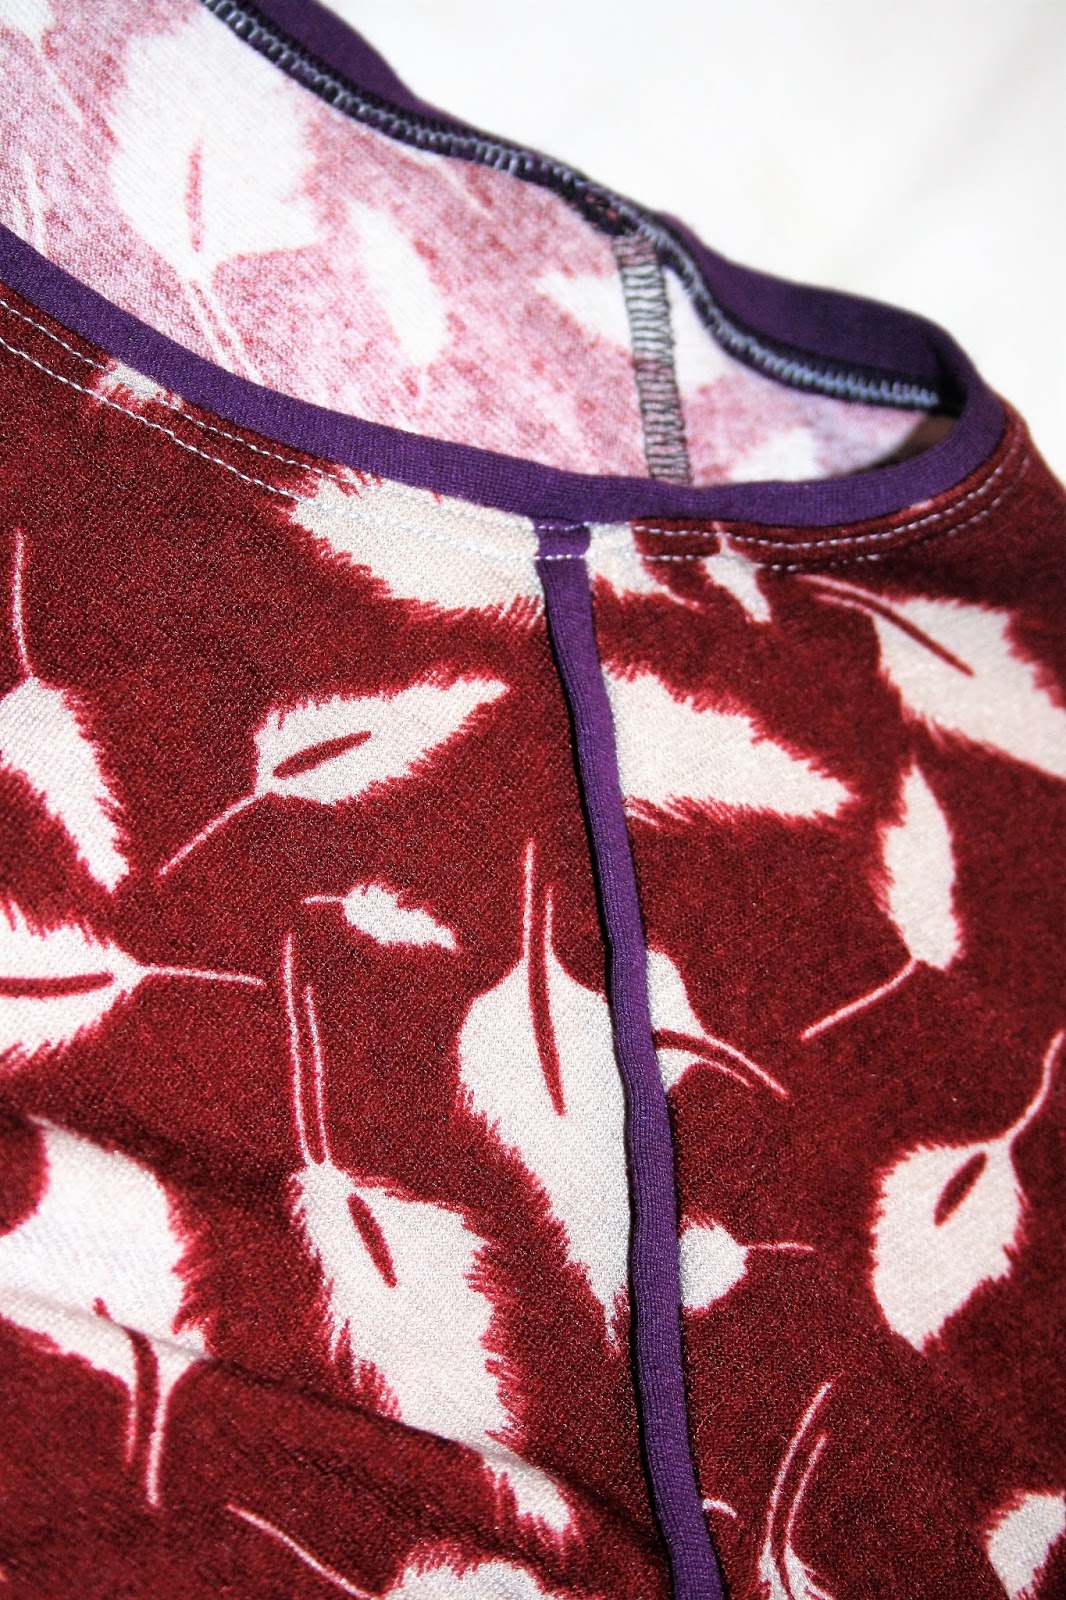
The burda hack dress. Basically I want to make this dress in a slightly more wearable colour, whilst I love this dress and I love the style but thew pale turquoise is only really suitable for summer I'd like to make a version in a purple/red colour and maybe in a floral? 


Prima Raglan Top. After the success of my first version I've now decided that I want a huge wardrobe of these! One for every day of the week at least!


Simple sew jackie o suit. I really want to test myself and try and make a beautifully fitting suit. I'm thinking of using a black or charcoal coloured wool/tweed and having it as my funeral suit, or is that a bit grim?


Prima wrap skirt! I love how contemporary this skirt is! I am hankering after a mini one in a faux leather or suede.


The kimono Wrap dress. This dress is such a wardrobe pleaser I can just throw it on with a slip and its instant boho or I can team it with jean and a vest top and use it as a cardigan.


The simple sew Lily dress. Okay confession time I brought the copy of this magazine for this dress! I kind of want to make it in a lace with something lining it underneath. But I just love the style and I think it will make an awesome dressy dress.


GBSB wrap dress. This is another one of my wardrobe staples now. Its just so easy to throw on and I've had so many compliments! I definitely need a few more of these!


Simplicity 1365 - I have already made the halter top but I;d love to make a dress version by attaching a skirt and having a zip at the back not ties!


vogue v8974 , this is a vintage reproduction and I actually have the fabric to make a wearable toile of it. Hopefully it turns out nicely and then I have some liberty cotton to use on a proper version.

So have you joined the #makenine2017?

Much Love

Frankie

xx

Sunday 29 January 2017

Pink Spotty Baby Bunny

Heya Folks hows it going? Coping with the weather? Me and Little Man were both snivelling wrecks by the time we got to school on friday apparently the only thing that can make the cold worse is having the wind blow it right into your face! 

But anyway this is a project I finished a while ago. My sister requested I make one for her to give as a baby gift. She knew what gender they were expecting so after I sent pictures of some fabric ideas and she okayed them I got cracking.


Both of the fabrics are by Dashwood studios, the pink spotty fabric is called flurry and the brown flowers are from the Suffolk garden range. They really are lush fabrics to work with and the colours are just so beautiful and vibrant! 


I didn't make any changes from the pattern apart from adding a small handmade tag to its back ear! 


It was a nice mindless sew to be honest and I'm hoping the recipient likes it! It did take me a while to choose colours for the face and the bow though but I think they turned out pretty cute!


In other news , I appear to be sleeping better but I'm sick of this weather. I literally cannot wait until I can start sewing cut summer dresses again!

My crochet blanket is coming along nicely and I'm hoping to have it finished soon. I've told myself I can;t start my new knitting project till its finished so hopefully that will motivate me! Although when I've finished crocheting all the squares I still have to attach them all together!!! 

Much Love

Frankie

Friday 27 January 2017

Raglan Sweater

I've been seeing Raglan jumpers all over instagram lately. Mainly because of the the #lindenswap which was happening before Christmas. 

Now I don't own the Linden pattern [which is by Grainline studios BTW]  [and I can't justify spending $16.00 on it] But I did still have a hankering for a raglan jumper so I thought it might be worth taking a dig through my patterns and seeing if there was anything I could frankenpattern........

As it goes I have a prima pattern for a raglan jumper and its a pretty good dupe! Now prima isn't every sewers choice yes you have to trace the patterns, yes the styling is quite frankly awful and yes the instructions are about as clear as mud mixed with oil. BUT they have really good bones, The patterns are simple lines and simple styles and they can be used as a great base for makes.

Which is how this came about.


FYI this particular pattern came with the may 2016 issue, so you might be able to track one down I don't know if that's an option on their website [I personally don't subscribe to Prima this was sent to me by lovely pen friend who I believe does!] 

Now I didn't follow the instructions in fact I didn't even look at them, instead I just traced off all the pieces and then used the width of the sleeves and the bottom of the jumper to create my own pattern pieces for the cuffs and bottom band. I knew I wanted the jumper to have cuffs and a bottom band to give it more of a ready to wear vibe.


Now the leaf print fabric is from abakhan and cost me £4.03 and the purple I used is a scrap from this dress and is from sew essential . I also used the purple for the piping in the raglan sleeve detail. piping I hear you say? Oh yeah guys Frankie has only gone and learned herself a new skill! Well I say piping it's more like a piece of fabric folded over and wedged in the seam, so its basically piping but with the rope part, which I guess is essentially the pipe?

Anyway I'm sidetracking, I love the piping on this as I think it helps to break up the busy print. Plus ya know PIPING! And its a lot easier than I thought once I;d worked out the seam allowances! 


Now I sewed the whole thing on my overlocker but I top stitched the seam allowances down using my twin needle on my regular machine. I'm not sure if that was completely necessary because I good iron might have persuaded the overlocked edges to stay tucked away. But I knew this was going to be one of those items that just does not get ironed ever...... So I stitched them down. 


I think the top stitching came out okay anyway so that's a bonus, I did have to use my walking foot though because things were not looking good without! 


These are some close ups of my pretty awesome piping! I actually prefer this to regular piping which sticks out a bit so I think I might add it to more things! 


So the verdict! 

When I first made it I kind of hated it, It was one of those occasions where you love the fabric in the shop but then you sew it up and your like hmmm does this suit me? 

But then it recieved the seal of approval from my mum, our friend and my husband [Who even said he thought it was shop brought] So I decided to give it a whirl! 

And now?

I LOVE IT! Seriously you cannot get a more comfortable jumper for on the school run, the poly knit fabric is thin enough to wear under a coat but thick enough to keep you warm and its just so easy to throw on! I'm not sure if I like it better than my coco hoodie hack but It definitely has the same effortless school morning vibe going on.

So I will definitely be making another one, and another one and another one!!! I want one of these for every day of the week and I'm tempted to try and make a few up with hoods and stuff and of course some more piping!

In other news! 

I've been grumpy as hell today! Which is lovely for everyone, I'm blaming the awful night sleep I've been having , if its not nightmares its waking up every couple of hours so please if you have any remedies for a good nights sleep [aside from down a bottle of jack] please let me know!

I finally brought the fleece to finish my latest baby quilt so hopefully that will be up soon! and it will be the 5th baby quilt I've gifted. I'm really loving the gifting of baby quilts mainly because it gives me a good opportunity to try out new designs and play with fat quarters! So if some people could get knocked up that would be great!

Much Love

Frankie 

xxx


Wednesday 25 January 2017

Hobbycraft Haul!

Yet again I was very lucky to receive Hobbycraft gift card for Christmas, and naturally I spent a good couple of hours trying to navigate their website [is it just me that finds it really annoying that you can't just view the whole of sewing?] and sorted myself a little delivery! So without further ado here is a £30 delivery from hobbycraft!


Cross stitch kit!  Recently my fingures have been itching to cross stitch! I'm blaming the fact that Rikkis Nan has so many beautiful framed cross stitches around her house!


Unpickers, I'm not sure how I ended up with two I think I must have accidentally double clicked! Luckily I can never have enough seam rippers!!!


Bias binding - not a clue which one I chose! This was added as an attempt to get free p&p!


Felt tip Pens -  Yet another attempt to get free p&p, I think these cost 50p! 


Safety pins, I always put off buying these but I really did need some for quilting, currently I've been using regular pins and those tricky little devils just love to fall out! 


Ball point needles, I's really enjoying sewing knits at the moment so I thought it was best to stock up!


8mm knitting needles! These have been brought for my next big knitting project, I had asked Rikkis nan if she had some and she didn't so I brought some and then lo and behold she managed to track a pair down through her sister in law! Sods law eh? 


Little scissors, I have an obsession with scissors seriously the amount of pairs I have is just embarrassing! But in my defence I only buy cheap ones so It doesn't matter if they get trashed. These are actually pretty sharp scissors and I have taken to wearing them on some ribbon around my neck!


5 balls of hayfield chunky wool, I had a bit of an issue with this actually , on the website the wool looks red but when it turned up its more of a burnt orange! Which I probably should of realised by the name paprika. Anyway I would send it back but I'm far to lazy so I'm just going to roll with it and hope it suits me! 

And that's it! 

In other news, I just had a pretty luxurious middle of the day bath and I'm feeling really zen! A feeling which I'm sure is going to go as soon as I start cleaning up!

And we have little mans birthday yesterday. I managed to hold it together this year and although he had to spend the day at school we did have a lovely meal at pizza hut after! 

Much Love Frankie

xx


Sunday 22 January 2017

Tape Measure Lilou Dress

I'm currently sat in my dressing gown after being evicted from my bed. To cut a long story short I took a sleeping pill last night because I haven't been sleeping well so you can imagine my delight when lil man woke up at 6.00am this morning. Naturally he has since fallen asleep in our bed so I've been regulated to the settee.

Anyway I was going to write this last night but the lap top threw a dizzy fit and I spent the night nodding intelligently whilst Rikki muttered about IPs and Wps and Connectivity........ Literally didn't understand a word............. And the swines just popped down stairs to disturb me and left a guinea pig on the floor!

But anyway here's what I'm actually here to post about! 


So its a basic lilou dress from tilly and the button "love at first stitch"! But on the plus side I found all of the details of the alterations I've made hidden in a notebook down the side of the sofa! So I only work using the bodice block and tend to wing the skirt portion depending on how much fabric I have. But on the bodice block I originally traced a size 3, but since then have take about 2cm out of the top of each strap [front and back bodice piece] and widened the darts on the front bodice by 0.5cm and widened them at the back by 1cm and that's it! The fit is pretty banging if I do say so myself! 


The fabric is a cotton? that I got from abakhans [Sorry I cant find it on their website guys!] It came in this sort of greys and red colour way and a more muted beige colour way. I decided I like this one better but I know for a fact it also comes in a pink and orangey colour way and I've got my eye on that one next!

It behaves as you expect from any cotton really. Which did sort of remind me how much I love working with cotton! after sewing with knits and floaty fabrics so much recently the idea of using a fabric that actually behaved itself was quite novel! 


The zip is also from abakhans and came out of one of those £1 assorted bags of zips. Its an open ended zip so I stitched about an inch about the bottom so it can't come undone. This zip is also one of the neatest I have ever done in my entire life! seriously for an exposed metal zip its just so pretty!

I brought two metres of this and did some pretty crafty cutting to eek out this dress, I also went for a slightly less full skirt mainly for practicality reasons! I learnt in Vegas that the fuller the skirt the more likely a gust of wind is the flash your knickers! So the skirt is 20inches deep and I'm not sure how much across? But lets put it this way I have enough left from my 2m to make a skirt aswell! #winning 


The bodice is lined, and I sewed the hem by machine, which is pretty unusual for me as I usually like the hand sew my hems! This change of heart was because I wanted to finish the dress before I had to pick up little man from school!

Anyways I actually made this dress a little while ago when I was fed up of the miserable drizzle we were having and I thought a summer dress might encourage the sun to come out! The next day it snowed.............So yeah I guess you can blame me if your car got stuck!

Much Love

Frankie

xx

Tuesday 17 January 2017

Stripe Coco Dress

I've never thought of myself as a sheep, but here I am posting about my striped coco dress....

Okay so pretty much every single sewing blogger in the entire world has made a striped coco dress. Mainly because if you can pick up the right fabric you can honest to god look like you've just walked off the pages of the Boden catalogue.

And I'd like to say I'm really different but I've been reading a new book about Coco Chanel and I think I've been underestimating how chic a little striped dress could be. I mean its ridiculously simple put on dress, put on shoes....done. I've pretty much worn this with all my shoes and it never fails to look cute. Its the easiest outfit ever. Which is a huge plus for someone who hates getting dressed in the morning.
   

So anyway! Stop waffling Frankie give us the details! Okay so the fabric is one from Abakhans from one of the precut bins marked poly knit. Now I had a massive amateur moment and didnt check the whole length so I stupidly though that the line running vertical to the stripes was just a flaw from the end of the bolt! I WAS WRONG! These little devils showed up every 40cm or so. Which meant I had to faff about with my cutting out. First I tried placing my pattern pieces so their would only be horizontal stripes but the pattern pieces were too big. So then I considered have vertical stripes with the odd horizontal one...... Yeah I know thank god I scrapped that idea. Then I was like Oh Frankie you dumbo just used the single stripe as the centre fold for your pattern pieces. I know yeah I feel like it should not have took me so long to reach that conclusion!   


So in the end I have a line down the front and the back and you know what I quite like it! So my polyknit fabric did win out in the end! By the way it was £7.19 for the fabric and I have enough left for a jumper or something! 


The main seams were sewn on my over locker and I just did all my hemming on my standard machine. I am a bit gutted though, I was too lazy to faff about putting in my twin needle so I just used the over lock stitch on my machine and its not quite the finish I'd have liked. I used the same stitch for my coco hoodie hack and that look good but I think it was the wrong stitch for this. Anyway Ill live with it because the idea of unpicking it all makes me want to cry but lesson learned, use twin needle!

There's not really much I can say Its a super simple pattern that sews up really quick and this is my third one [and so far my favourite]  Its lovely and snug [not quite as snug as my fleece version but snug enough] and as I've already said its so easy to throw on in the morning! 

So yeah a grand success!

Much Love

Frankie 

xxx  

Sunday 15 January 2017

My First Ever Crochet Project!

I've done it guys I've actually cracked it! I have mastered the art of crochet! Well I say the art... I can manage a granny square! BUT COME ON GUYS! That's a pretty big deal! Especially for someone who's been struggling for as long as me!


It all started when I unwrapped a Christmas present from my mum and dad, they had gotten me a book on easy crochet. Mainly because when she had a flick through she said the instructions were pretty clear. My first thought was "dear god" how dare they buy me a book on a craft I CANNOT DO! Those swines! Then however, I manned up and thought well why not give this another shot! And guys I did It! I conquered! I mean I only conquered a small amount, if I was an evil dictator it would probably be the equivalent of the Vatican [FYI that is the smallest country in the world , I am so ready for university challenge!]  


Anyways naturally as soon as I had gotten to a place where I felt comfortable with a hook in my hand! [my house is currently littered with my many attempts!] I decided to start a big project! Because why not run before you can walk? I decided to make a blanket!

I know right a blanket, I've never even made a big knitted blanket! but in my defence I'm finding crochet very relaxing and I'm really enjoying how easy it is to pick up and put down as well as the fact its using all of my odds and sods of wool.

Although I am a bit worried I might run out at some point. I've made a desperate plea to Nan for scraps and she says shes going to have a look for me!


So here is the plan: the idea is that the pink ones are multi coloured granny squares of five rounds, the blue ones are five round granny squares of only two colours, the purple are ten round ones in multiple colours and the light green and dark green are 15/20 round ones of multiple colours! 

Then they will be arranged according to my picture in a sort of whimsical scrappy fashion to hopefully create a scrappy patchwork granny square quilt!

So far I've completed all 23 of my five round multi coloured squares and my large twenty round one! So I'm well on my way to snuggly goodness! 


Colour wise I'm working with a lot of dregs from my drawers I'm trying to keep to colour palette, to blues, greens, purples, blacks and white. And so far I am loving how its looking! In fact it might be one of my favourite colour pulls yet!

Size wise I'm aiming for 1 metre square! each patch is just about 10cm and there's ten per row so hopefully my maths works out and my tension stays the same throughout!

In other news THERE WAS SNOW! Yerp we had snow it was all very exciting especially seen as we live on a hill! Nothing quite like watching people struggle on hills in winter! And Lil man had the day off school! I'm not 100% why? the snow wasn't particularly heavy and they had already texted at 6.30am to say it was still on but lo and behold at 7.30 [after I had already gotten us dressed!!!!!] they texted again to say it was cancelled! Leaving me at home with no milk delivery! no bread and one small child! Luckily my mum and dad braved the roads to come and visit us and brought bread! 

anyways I think that's about it! We've got little mans birthday coming up next week so I;m sure preparing for that will keep me busy!

Much Love

Frankie

xxx  


Friday 13 January 2017

1950's style Cotton and Chalk Denim Trousers/Dungaree Mashup

That's quite the beast of a title isn't it? But it does exactly what it says on the tin! 

So in a nutshell! [a rather large nutshell] This is my interpretation of the Sunday set dungaree trousers, by cotton and chalk. Now I've already made the dress from this [you can see it here] But after I really wanted to give the trouser option ago! 

So the pattern, I did make a few changes, for starters the pattern calls for gathers at the front and back but I just couldn't get on board with that because they might make my hips look poofy. And I am not about poofy hips. So I changed the gathers to a simple pleat on either side which I think is a lot more flattering and less bulky. 


Secondly the pattern calls for a centre back zip and whilst I'm not opposed to a centre back zip in trousers It felt kind of wrong to do it in a pair of denim dungarees so I did a complete hack! Basically I decided instead of trying to do a fly front because OMG I am not ready for that level of stress again.[And would it look weird with the bib?]  I went for two side tab closures, with buttons and button holes I thought they might give a nice vintage sort of feel which is what I was going for.

anyway here's a brief [and pretty terrible description of how I calculated the front and back waistband. 

- Measure Waist
-Mine was 28inches, so divide that by 2
28 ÷ 2 =14
- add seam allowance and ease [roughly 1.5inch]
 14+1.5=15.5 
-15.5 inches = front waistband

-back waistband 
-half of waist measurement [14] + seam allowance and ease [1.5] + 4inch for overlap
14+1.5+4=19.5inches=back waistband

I also added a small zip [recycled from 2x old pairs of jeans into the side seams of the trousers, this has two uses, 1. it looks bad-ass and 2. it means you can get in and out of them with having a split in the side seam and potentially showing your pants! Or some squishy fleshy bits. 


And as you may have gathered from the picture above I made another pretty big change! I made the bib detachable again. Just because it gives the item a lot more styling freedom! I did it the same way as I did my delphine mashup.  


All the buttons are from my stash but the ones on the side tabs and the ones on the bib don't match. I don't think its a huge issue though?

I also did all my top stitching in a golden coloured thread which means they look a bit like ready to wear! I was going to do flat felled seams down the sides but I couldn't work out how to do them and incorporate the zips so I just top stitched up the edge of each seam. 


I love the mock jeans feel that these have and the slightly 50's vibe, definitely feel like I should be digging for victory and stuff! I even like the turn ups at the bottom! Wanna know a secret these are not even hemmed, not even stitched I literally just folded them over! How lazy am I! [giggles]


Here's what they look like without the bib, Its a shame you can;t see more of the detail but this denim was such a monkey to photograph! 
The fabric incidentally was a wedding gift from my mum and dad! And I have a sneaking suspicion it came from abakhans! 


This is me doing my best Rosie the riveter impression....... Anyway I adore this make, I don't think I'd make it again but if I did I think I would make a few more improvements:

1. place button holes further on the ends of tabs [they flap around a bit, I'm wondering if a press stud at the end may help?]
2. Use thicker interfacing!
3. I really wanted the add side seam pockets and I miss that they are not their, but I just don't think I could work it out! That said I think some bum pockets would work really nicely!

But even in spite of it flaws I still love it! And its quite might to have a pair of denim trousers with a slightly different shape!

Much Love

Frankie!

xxx


Thursday 12 January 2017

Wooly Projects You Tube Video

Here's my latest You tube effort!! Its all about whats I've been knitting and dare I say crocheting!!! 

Hope you enjoy!


I think I've worked out the distortion issues! But please let me know if its distorted at your end!!

Much Love

Frankie

x

Wednesday 11 January 2017

Knitted Scrump

I no longer advertise my services for making things, I found that constantly trying to sell things that I loved to people who quite frankly new they could get something cheaper from china was quite exhausting and sucked the fun out of making things!  Instead I now only make things for other people as gifts or special requests! I have a few of my old customers who I will never say no to though. People who supported me from the beginning and are just really cracking people! And one of those people is Kelly I've known Kelly for absolute years and she is the legend who ordered the knitted Stitch and the knitted Yoda! [by the way I am considering actually putting these patterns on here at some point so keep your eyes peeled!]

Anyway this time she asked me if I could make "Scrump" from Lilo and Stitch for her fiancee! Scrump for those of you who don't know [and I sure as hell didn't] Its the little handmade doll that Lilo carries around. Now according to Kelly whilst Lilo and Stitch stuff is easy to find at the Disney store scrump is much much harder!

Image result for scrump lilo and stitch

Enter Moi!


Its a very basic garter stitch body and then I knitted a bow and added the face using embroidery threads.

I probably should disclose that Rikki actually picked the wool for this project because I was in the shop umming and ahhing and couldn't decide if it was a close enough colour match. As I said previously I'm considering sharing all of my self drafted knitting patterns for free on here.


Anyways I'm super pleased with how it turned out and Kelly was chuffed to bit with it when she came to pick it up!

Much Love 

Frankie 

x