Thursday 28 June 2018

The Gingham Dress - Newlook 6390

This is my first version of new look 6390 and I'm gone level with you, its not great.

But I'm showing it anyway because let's be honest everyone makes a toile that's slightly less than wearable every now and again don't they.


Its not too bad from the front. There's some pretty dodgy pattern placement (those gingham squares can be a right Royal pain in the booty) but other than that its not to bad. 

The neckline gapes a bit so I've altered the pattern pieces to remove a wedge from the neckline and I took a bit out of the back seam, and the straps are too long so I've shortened that pattern piece too however its still not a great fit........


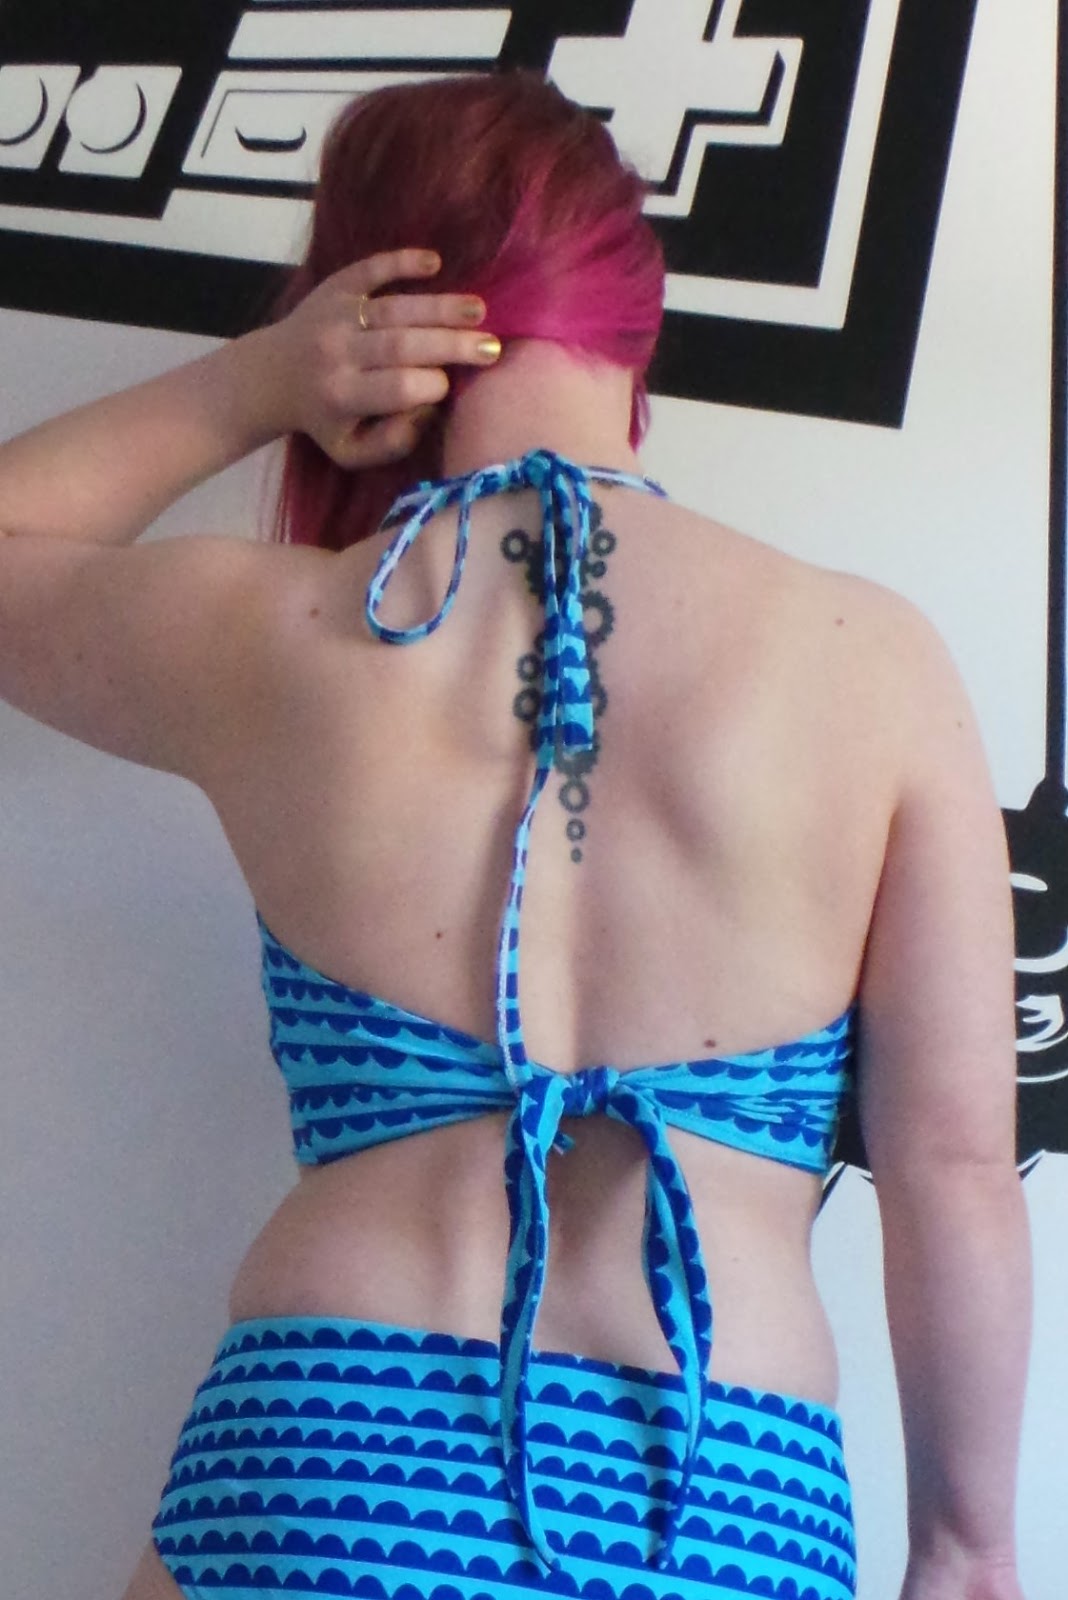
The back is where the problem is. Its really really gaping at the top. I'm not sure if I need to take some more out of the back seam or if I stretched the neckline out too much but ether way I think its going to end up being put in the alteration pile


And it does deserve to be altered because this cute could this dress be if it fit properly? The large check gingham is from abakhans and comes in loads of different colours, I think I want pink next.

I especially like the waistband. But to be completely honest it was a short cut for me. I knew that their was no way I'd be able to pattern match the squares so I thought it would be much easier to just cut it on the bias. 

Which does make the waist band more prone to stretching so to make sure this didn't happen I made sure to interface the back of the waistband pieces straight away. It worked really well and i can happily report no stretching.


Currently this is my favourite dress pattern. Before this I made two button up the front ones ( Here and here) which oddly, didn't have any fitting issues. But since this version I made two more which will be up on the blog soon.

And luckily they both fit really nicely.

In other news:

- I'll man has earache, well at least he did I'm kind of praying that its gone now.......because there is nothing worse than watching your baby in pain.

- Polly is still settling in, she's not eating or drinking much still, but she walks nicely on the lead and today she gave me a really big hand lick. Which according to google means that she really likes me so yay!!! 

- I've also photographed a few makes today and I've gotten back into the swing of sewing against and have some projects that I'm really excited about!!!

Much love 

Frankie 

Xxx


Monday 25 June 2018

Polly's New Blanket - Learning to Sew Patchwork Curves

Life's pretty good at the moment.
I'm pretty much on top of the housework, I'm hitting 10,000 steps a day and I have a new dog. 


Anyway I've decided that this year would be all about learning new skills and learning to piece curves for patchwork. I've had a subscription to love patchwork and quilting magazine for a few years now (thanks by the way Netty and Keith) 


Luckily the magazine come with free templates etc so I used those to draw straight onto the fabric. It saved a lot of time and meant I didn't have to spend a hour on the Internet trying to find a decent template. 

Piecing them together was more tricky than I expected. Obviously I piece a lot of curves for dressmaking but this was a whole new kettle of fish. I used about four pins per quarter circle and swore a lot. 


Fabrics wise everything was from my stash , there's a right mixture if bits and pieces in their including some of my favourite fabrics . Living with boys I tend to use a lot of dark colours so I really enjoyed making this pink explosion for Polly. 

Quilting wise I kept it simple and just did some straight lines , I was going to do free motion quilting but I couldn't get the bloody tension to work properly and after I'd unpicked some of it once I wasn't going to risk doing the whole thing just to have to undo it if I hated it.

Luckily because its a teeny weeny quilt it didn't take very long to quilt at all. In fact I did all the quilting in the adverts of love island. 


Naturally I couldn't get a nice picture of Polly sat on the blanket , I tried bribing her with treats but it didn't really help. To be honest most of the pictures were of her bum and then of course their was the one of her pooping........ 

So yeah this is the best I could do. Polly spends a lot of time in her basket as its her "safe place" and normally she doesn't look as happy as this but see just been for a walk so she was living her best life. 

That or she was thirsty? We are still having trouble getting her to realise that the water and food bowl is just for her. 

I finally have access to a tablet! My tablet went squiffy last week but luckily my kind neighbour Chelsey had a tablet she didn't use so I'm using that. So far I love it its HUGE so I can actually use the screen to type rather than having to plug in my keyboard! So cheers Chelsey love you!!! 

In other news! 

Lil man has his voice back!! 

Much love 

Frankie 

Xxx


Friday 22 June 2018

Check Trousers - Newlook 6421

I have no idea if I love these or hate these. Typically I;m not a trouser girl and if I am its jeans. But I wanted a pair of check trousers. I didn't know what kind so I asked instagram whether I should go for flares or a skinny leg pattern. 

The general consensus was that I'd look like a member of  the bay city rollers if I went with flares and most people liked the idea of trousers better. 


The pattern I used was Newlook 6421. Its a fairly simple pattern, front and back trouser pieces and a waistband. I opted to swap the side zip for a back one because I hate side zips but other than that I stuck to the instructions. Oh apart from swapping the darts for little tucks. The wool I used was quite bulky so I thought a gentle tuck would be better than a dart because if you have a dart you also have the excess fabric behind it. 


The pattern matching is not 100% especially on the back. I know I should have cut out the pieces flat and flipped them over to make it perfect but I just couldn't be bother. Especially for a pair of trousers that might not get a lot of wear. 


I do like the way my bum looks in them though. I basted up the side seams to try and get the right fit and I think I did okay. I do wish I had tapered them more at the ends though. 


This is my major gripe with them though. The way I placed the pattern basically makes a little triangle over my "goods". I cannot believe I didn't think about where I placed that part. I was concentrating so much on trying to match the pattern on the side seams that the crotch didn't even cross my mind. 

In future I'll make sure the crotch is always the first thing I think about.............. 


But the big question is are they wearable or do I need to wander round shielding my crotch? 

If you saw me in the street would you be like "HEY EVERYONE LOOK AT THE GIRL WITH THE WEIRD TRIANGLE ON HER CROTCH!!!!"  Or would you just think my trousers were cool?


The sewing inside is neatly finished. It does occur to me that I should start showing you the inside of my makes but its just such a faff, its hard enough finding ten minutes to actually take the pictures with decent lighting.  


You let me know what you think of the trousers, are they suitable for out and about wear or should I just stick to wearing them to mooch about the house in? [by the way, I'm not sure heels are the way to go with them but my black ballet flats are currently in the bin!]

In other news! 

-Polly is still settling in nicely, we've been on a few walks and I think she'd eating and drinking better. I am realising how few bins their are in the local area and I tell you , walking around with a little bag of poop is not the one. 

- Lil man has lost his voice. He's quite well in himself [no fever , not sleepy] but he has a bit of a cough and he voice is gone. So if anyone has any remedies on how to get his voice back please let me know. He has his school play next week and he's worried he won't be able to say his lines. 

- I've got a mountain of projects to photograph......

Much Love 

Frankie 

xxx


Tuesday 19 June 2018

DIY Wooden Clapper

So far as I can tell sewing tools come in two categories. Your average run of the mill type bits like needles and pins which start off cheap and can be more expensive depending on what quality you want and bits and pieces you don't really need but kind of do that are really blooming expensive for what they are. 

I desperately wanted a tailors clapper for ironing stubborn wool fabrics. Basically you put the clapper on top of the seam after you've ironed it and hold it their until the fabrics cool and using some sort of magic it makes the seam a lot flatter and look a lot neater. 

Naturally to begin with I used an rolling pin or a wooden spoon but that was becoming a bit problematic because LOL want to make some biscuits but I can't find the rolling pin best search the sewing area for 45 minutes and try and find it. 


After looking on line I realised that the majority of tailors clappers are just a big hunk of wood with a pointy end and for £24 that does seam a bit steep. 

Well this girl has a shed full of odd bits of wood [when we dismantled the old sofa Rikki chose to keep what he called the "good bits of wood" and put them straight into the shed were they sat waiting because they were always too big or small for whatever project he was doing] AND a GCSE in product design..... I;m not kidding by the way I took three practical subjects at GCSE and basically spent two years messing around making things. 


Typically I don't really do wood work anymore but I thought I could manage to saw a few bit of wood and knock in a couple of nails. 

It was harder than it looked. 

For starters our saw was fairly blunt and secondly I had wanted to put screws in but couldn't get the blooming things in so ended up with nails.


The front part isn't completely symmetrical and I didn't really get around to rounding off the bottom portion because I don't have access to a sander BUT it works and Rikki's Grandad has promised me we can make a prettier one together in his workshop at some point. 


I was going to do a tutorial for this but to be honest you can just use a flat piece of wood so a tutorial would be a bit redundant. 

In other news:

We have a DOG! If you've been on my Instagram in the past few days you'll have seen our latest addition. We adopted her from the city dogs home, she was found as a stray but was micro chipped which means she has had an owner at some point. 

Shes still a bit scared and isn't really eating much or drinking more but she's slowly relaxing. We've decided to call her Polly and so far she's very lovely. 

If you want to see whats on my Instagram I've linked it to my new Facebook page, so if you have Facebook then you'll be able to find my Instagram posts there. 

Much Love

Frankie 

xxx


Thursday 14 June 2018

I made a Bikini!

Okay this is actually a bit of a tough one because LOL never been half naked on the Internet before. 

You see the thing is i have only recently started to embrace my body. Yes its a bit short and it jiggles a bit and I am fully aware that if I had any inclination for exercise I could look just like on of those girls on love island BUT I quite like it. 

Well at least I'm learning to like it. Which leads me to the bikini. Whilst I have found to confidence to wear a bikini if I'm say lounging by the pool, I was still having a struggle with the whole swimming and playing in the water. Which is literally my favourite thing to do! I love water slides and me and Rikki were splashing so much on our honey moon that the lifeguard came and told us off! 

The issue is that shop brought bikinis don't seem to actually be designed to swim in. The straps are tiny, my side boob falls out, the ties come undone, the bum part seems to get more and more thong like every year and the front foof covering part is going to same way. 

What I needed was a bikini that offered full coverage and didn't need to be completely adjusted after I'd been down the slide. 


So pattern wise I adapted a free pattern from madalynnes website  I used the noelle pattern and altered it to be a halterneck and to tie at the back. I didn't want to buy a pattern in case it turned out that I hated swimwear sewing. 


Construction wise I cut a few corners. I looked at my RTW bikinis and unpicked an old one and found that the cheaper ones didn't contain any elastic just power mesh and tops stitching. And well if its good enough for mass production its good enough for me. 

This was my first test version so I used some swim fabric I brought in the sale at abakhans and instead of lining it with power mesh or nude swimwear fabric I just lined it in the same stuff. Which I guess means the bikini is completely reversible. Which could be useful if you spill ice cream down your front or something. 


I really like the way the back fits but I wish the ties were a lot shorter. Although the length does mean I can get a good double knot in it so theirs no risk of it coming undone. There's no elastic in the top at all and everything stays in place very nicely.  I even popped it on and took a shower and then bounced around and everything still stayed in place!!


I also like the way the top fits from the front. the bottom band adds enough structure to keep the girls in place. Its high enough up that I don't need to worry about my boobs falling out of the sides or over the top. I can also lean forward in this without displaying the twins. 

Also on a very personal note the double layer of swimwear means that you don't get too chilly.... If you catch my drift..... You know things don't protrude..........


The bottoms are very flattering I think. I took about an inch off the top of the waist because they were nearly up to my belly button. So they are in that comfortable zone where they hide the pooch from lil man but aren't up to my armpits. I wish the leg was cut a bit higher because that might make my legs look longer but I'm very happy with the width of the crotch. I find it covers all my "business" very nicely and I even did a couple of lunges in front of the mirror to make sure nothing could be seen. 

Crotches are very personal though so if your making your own I suggest you keep trying on to make sure you get the right amount of coverage for you. 
   

Now on the bum side of things their is a cheeky bit of cheek. I'm very proud of my bum at the moment and well this is the best its going to be really isn't it? Unless I get into the habit of squatting every day which seems highly unlikely. 

Okay so as I said this is my first version. I have some mermaid fabric squirrelled away for another but here's some changes I'll make to the next. 

- Lower waist a little more
- shorten ties on back and neck
- line in nude swim fabric
- Make sure I get the pattern the right way around! [This ones got the pattern going both ways!]
- Raise the leg a bit.

I think that's it!

This was such a huge step out of my comfort zone but I really enjoyed making it! 

In fact it sort of inspired me to try and be nicer to my body and find more of the good points and less of the flaws. I've also declared this as the year I'm ditching the fake tan and embracing being pale. Every year I try to tan naturally which I can't because it just doesn't take, or I try fake tanning and end up a streaky orange mess that smells like a camel. So this year is the year of the pale. 

How are you embracing your body?

and

Have you ever made swim wear before? 

Much Love 

Frankie 

xxx


Sunday 10 June 2018

7 Tips For taking Blog Photos

It does occur to me that I should have written this post for me made may when everyone was taking 100million selfies a day for instagram but hey ho! 

Personally I hate having my picture taken, I'm very awkward in front of a camera and have a pretty gawky smile. I especially hate candid pictures where people take them and I don't know because 60% of the time I'm talking and the other 40% I'm eating and neither of those things are flattering in picture form. 

But writing this blog and uploading to instagram has meant that I've had to get over my fear pretty quickly. So here's some of the tips I use to help me take pictures that I don't fell like deleting straight after!


1. Use Natural Light

I don't know what kind of magic it has behind it. But natural light is your best friend, we're not talking sunshine here just regular day time light preferably without a cloud in the sky! Even for bog standard selfies natural light can really help.

2. Have Someone Take It/ Don't 

This is completely up to you, but for me I hate having other people take my picture because Its too off putting so I do it myself. However I know a lot of bloggers who prefer to have a family member or friend take their pictures because they think it puts them at ease. 


3. Use a Tripod

I use a tripod because I take my own photos so Its an easy way of getting the camera at the right height. But even if a friends taking them for you a tripod can be useful to make sure the image doesn't blur so it comes out pin sharp. I got mine as an aldi special buy [but they also have cheap ones on amazon] and and the base plate is standard so it fits both of my cameras and I got a mount for my phone too.

4. Remote Control shutter

I have two of these now, a posh one that I use with my slr and a small one that will link to basically any phone or digital camera in the world and they are invaluable! Not only do I use them for my blog photos so I can take them by myself, but I also set up the camera on the tripod and the remote control at Christmas/birthdays. Basically I set up the camera in a corner of the room where it can see all three of us and then every now and again I'll click the remote to take a picture. Which means we get nice candid shots of us all opening our presents without one of us having to be behind the camera! 


5. Use Props

Sometimes just having something to hold in your hands can make you feel 100% more comfortable infront of the camera. And if your don't have a prop try placing one hand on your hip or waist.

6. Play Music

I always play music when I take pictures. I put on one of my favourite songs and try and move around a bit whilst clicking. Yes I get a lot of unusable shots but I also get some really nice ones. Plus its always nice to have a bit of a dance isn't it?


7. Put your weight on one foot

This is some advice my wedding photographer gave me on the big day. Putting your weight on one foot can instantly make your look thinner and more relaxed , You can also try holding your body on a slight angle rather than straight on because that's more flattering as well! 

Good Luck and happy picture taking!!! 

Much Love

Frankie 

xxx


Thursday 7 June 2018

Pig Cross Stitch

Cross stitch is one of those things that always seems like a good idea when I start and then a day or so later I'm like eurgh....... 

Mainly because what the heck are you suppose to do with them when your finished? Rikkis Nan puts them up on her walls and it looks really nice at her house but I don't think we have the wall space. Also we don't really have a pig themed room? Or a room a pig would look good in?

I know some people put them on greetings cards as embellishment, but that's a lot of work for something that, lets face it most people put it in the bin a few days after their birthday [That said one of our friend mums always makes Lil man cross stitch cards and we have all of them saved and sewn onto a blanket, we are pretty sentimental though!]


But apparently one awful day in winter I forget all of these things and decided to do some cross stitch. This particular kit came from the charity shop and cost me 20p it included all the threads the aida and a needle. 

And I immediately cracked on, which leads me to my second gripe about cross stitch. WHY DON'T THEY LABEL THE BLOODY THREADS! As you can see the pig is made up of shades of pink and cream and beige. All of which looked very similar and had daft names like oatmeal and biscuit and champagne? It probably took me about an hour just to try and work out with colour was which and I'm still not 100% I got it right. 


I did however come up with a genius solution to make sure I wouldn't get confused again. I wrote the name [or at least what I thought its name was] on a bit of paper and tied the threads to the paper. Which now I've typed it out seems really bloody obvious but I've literally never done it before and have been confused so many times. So yeah if your a Muppet like me give that a whirl and see if it helps. 

I also coloured in the cross stitch guide as I went, but that seems really obvious as well.........

I got stuck on the outline [Well I didn't get stuck I was just fed up] So I winged it. But I think it looks okay? 

And yeah that's it. I did find it satisfying seeing all those little stitches build up into a picture and I guess it was nice to do snuggled up under a blanket when the weather was horrible BUT its still not my favourite type of slow sewing. In fact I think I much preferred my Embroidered table cloth so I might have to con Rikki into buying me another kit! 

In other news! 

- I'm on book number 26 of this year. I'm trying to read 50 books this year so if anyone has any suggestions let me know! 

- I've finished my cutting out for my demo on Saturday! So I'm basically ready, just need to pack up some sewing bits and bobs.

- We've had a bit of a grumpy week me and Lil man. Maybe its because half terms over but it just seems so unfair. 
Basically, I wake him up in the morning which makes him grumpy, then we have to get ready for school which makes him grumpy and me grumpy, I throw breakfast at him [he doesn't actually mind this part].
 Then we walk to school which can seem like five minute journey on a summers day and four hours when it rains. Then he goes into school.
 He finishes school and is tired and grumpy and full of all the reasons hes annoyed with me that day [I.E I forgot his hat, I made him wear a coat, his dads on nights, his dad has a headache, why don't I have the car, wheres his scooter] 
We walk home , he has some tea, he's still tired and we both just want to play or watch a film but lo and be bloody hold then theirs the homework. Luckily he only gets proper homework once a week but theirs reading every night and then by the time hes done that its time for bath and bed.

It just seems like the poor little guys getting no quality of life. There's no adventure because we just don't have time. And its worrying how much pressure is being put on a kid, I mean he's got an exam in a few weeks..... AN EXAM for a six year old!

 But at least now we are both really looking forward to the summer holidays where we will be chilling out and doing whatever lil man wants to do! 

So yeah that's my whinge of the day!


Much Love

Frankie 

xxx


Tuesday 5 June 2018

Sewing Scissor Themed Gathered Skirt

I feel like with all the excitement of me made may and those short bursts of hot weather we've been having I've not been left with a lot of time for blogging. I have however found a lot of time for drinking wine and relaxing.

But I'm trying my best to catch up with all of my old projects and photographs. It does mean that my hair doesn't look like these pictures though. I don't miss this shade of pink but I went a nice candy floss colour a few days after this and I really liked that.


I made this skirt during me made may because I had spent a morning trying to find a skirt to wear and had realised that I only have winter skirts or a few summer skirts that I don't really like [because of the print or because they are too short] In fact I threw a bit of a tantrum and there were clothes everywhere and I nearly quit me made may there and then before I gave myself a stern talking too.

Anyway after a morning of being stroppy I decided to whip up a simple gathered skirt.


It zips up the back, naturally I used a zip I'd recycled from something else so it didn't have to stopper things at the start. Which meant when I sewed the zip in and then went to make sure I could pull it up I pulled the bloody thing off. Ever tried getting a zip pull back on? Not as easy as it looks. 

Anyway I after I got it back on, I sewed the ends into the lining so it doesn't pull off anymore. 

Gathers wise I used the two lines of basting stitches method. After much deliberation I decided that I like this way better than the zig zag over some string method because the gathers shift about these when your sewing them! 


The fabric is a scissor print by rose and hubble that my cousin/godmother got me for Christmas. I really like this print because its still quite neutral and the grey will go with a lot of stuff in my wardrobe. Plus its always nice to have clothes that reflect that I love sewing!!!! 

The skirt is made from 1m of fabric so the construction is really simple. I did take a lot of care in how I finished everything though. I made sure the sew the waistband neatly, I used interfacing and I did french seams on the side seams. 


The length is actually pretty good. Its short enough that it does that magic trick of making my legs look a bit longer BUT I can bend over in it without showing people all my goodies.

In other news! 

-  I finished knitting a unicorn last week so that should be on the blog soon, spoiler alert its really cute and I might have to become a crazy knitting lady. 

- I'm officially addicted the 'love island'. Yes I know theirs only been one episode and its about as trashy as telly can be but my lovely neighbours Chels and Aaron thought I might like it and well I do! Its very easy to watch with a glass of wine and some chocolate. Or well a lot of chocolate! And I can't wait to see what happens next! It does make me feel a bit bad though because all of the girls are dead tiny, toned and tanned and I'm just sat in a dressmaking gown munching my way through whatever chocolate I can lay my greedy little paws on!

- I'm at Aakhans Hanley this Saturday!!!! 12-3pm demonstrating how to make newlook 6390. I'll be making the dress up whilst I'm their and I'll be able to answer any questions about what fabrics to use and what sort of techniques you need to know! Hopefully I'll get the whole dress finished! So if your free pop on down! 

Much Love

Frankie 

xxx

Saturday 2 June 2018

Me Made May - The last week

I actually think this is my most successful mmmay. I wore me mades every day and, had no major repeats [apart from cardigans etc.] and I only forgot to take a picture on one day. 
So without further ado here's my last few days of me made may!


Day 22

Dress pattern mccalls 7381
dress fabric - Gift from @saraknitsandsews

I wore this for lil mans sports day where I made an absolute Muppet of myself in the mums egg and spoon race. No really, Rikki got second place , lil man got 2nd place in both of his races and I was so far behind everyone else that I got my very own special sympathy round of applause..... It was awkward but Lil man did shout across the road "well done mummy you did super good" so that made all of my efforts and embarrassment worth it. 


Day 23

Pattern - cotton and chalk 
fabric - abakhans

I have no idea what I did this day but the fact that I hadn't ironed the bib properly wound me up all day. It kept flipping and floofing around. 


Day 24

Skirt Pattern - prima
skirt fabric - Craft Cotton Company

On this day Rikki made me garden which was annoying because I HATE gardening!


Day 25

Pattern - Tilly and the buttons coco jumper hack
Fabric - abakhans

This day was a bit of a mash up to be honest. I had to take lil man to school in the pouring rain, then I had to wait and speak to the head teacher, then I got home and dried off but naturally was still freezing. Then I went to pick lil man up from school but was an hour early because I forgot he had an after school club! In the end I wandered around town for a bit just wasting time really.  


Day 26
pattern - ?
Fabric - Fcfabricstudios

I wore this dress because it was a saturday and more than anything I just wanted to be comfortable! 


Day 27

dress pattern - Orla Dress
Dress fabric - abakhans

This dress is very nearly past its best. Its looking a bit scraggy now so it might have to go in the next wardrobe clearout.

Day 28

I wore my red checked dress and forgot to photograph it because I'm dopey!

Day 29
Dress pattern - gbsb
Dress fabric - ?

I always bypass this dress in my wardrobe because its so bright and colourful but every time I put it on I absolutely love it! I think maybe its the colour blocking that puts me off because although pink its my favourite colour I don't tend to wear it very often.


Day 30
Skirt fabric - ?
Skirt pattern -self drafted tutu

This was a super busy day. Me and lil man woke up in the morning because it was his 60th birthday and went for breakfast. Then we came home I gave Rikki some lunch and re sorted my face out so we could meet Rikkis family for his dads Birthday meal. We stayed at the pub until about 7pm and then came home and had our neighbours round because they were craving cake and we had cake! 


Day 31

Dress pattern - gbsb
Dress fabric - Abakhans 

This is actually the second dress I wore that the day as the first one got dirty when I was cleaning the house so I had to get change because some of our friends were popping over. 

And thats it! 

So what have I learnt?

- I have a lot of clothes, like far too many which means 1. I need to sew less frivolous stuff and 2. I need to have a wardrobe clear out

- I have gained a little bit of weight. No so much that none of my clothes fit but enough that if I carry on smashing a packet of jaffa cakes per night then I might have to sew a whole new wardrobe. [P.S anybody who's wondering how I'm in possession of so many jaffa cakes , Rikki works at a biscuits fabric and they have a factory shop. Needless to say we possess a lot of biscuits.

- I need to be more careful with my hemming, I was put off wearing a lot of my dresses because of how short they are. 

- I need some new underwear and some more slips etc. 

Much Love 

Frankie 

xxx