Sunday 30 July 2017

French Navy - An Orla Affair

I am so late to the Orla party most people have gone home apart from the guy who's drunk in the corner! 

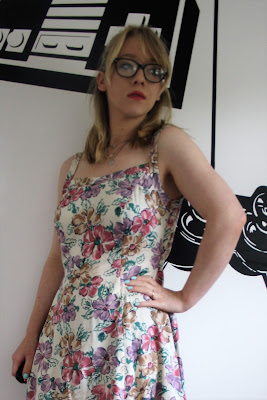
The Orla dress is a pattern by French Navy and get this guys its FREE! Yep as its her first PDF pattern the lovely Sarah has decided to give it out for free and well you guys know how I love a free PDF. Even if I do hate taping together all of those blooming sheets of paper! And as an added bonus me and my printer had a row again [Seriously considering couples counselling for me and that bloody thing] So it probably took me about an hour just to get the flaming thing to print!  


But less on me and my printers marital issues and onto the dress! The pattern comes in sizes xs, s, m, l, xl, which is a bit of a change from the standard numbered measurements. Now the pattern is drafted with a 1cm seam allowance which is clearly stated in the instructions. Typically I use a 1.5cm seam allowance and I was tempted to add on the extra 0.5cm but I'm lazy so instead I just decided to cut a bigger size. Now I measured as a 14 which is a L so that left me cutting a size XL, using a 1.5cm seam allowance and hoping for the best!  


It did not work! The bodice is meant to be quite loose fitting and well mine fits pretty darn snugly! So next time I'm going to stick with this size but use the 1cm seam allowance and see how that goes! Although part of me does wonder if some of the snugness is down to the fact I decided to over lock the whole dress and I had to cut off my side seams and re over lock them because I'm an idiot! Long story short I had already decided to set my sleeves in flat but sort of forgot....? because as I said idiot!    


I also didn't have a 40cm zip like the pattern says you need so instead I improvised and went for a keyhole back and shorter zip. The neckline closes with a small button and loop. Which is actually quite nice for using up odd buttons!


This one was a lil faux mother of pearl button. I have no idea where its from, probably one my mum found in a charity shop or a friend gave me.


I also didn't use bias binding for the neckline instead I just overlocked it and folded it over. It looks neat and it lays flat so it works for me! 

Here you can see the overlocked insides, which look all pretty and tidy! 


Bodice wise its got front and back waist darts but no bust darts. Its got cute lil cap sleeves and a gathered skirt. One thing I do really like is that the skirts not too full. Its enough to create a slimming silhouette but not enough that you need yards and yards of fabric, 


The fabric is the same drapey viscose that I used for my Blitz dress I think it works for this type of dress but I am a bit worried the the strain on the seams might mean it falls apart quite quickly!


So yeah all in all I love the dress and its a brilliant free pattern [which you can find here]

In other news!

The weather is messing up the TV signal and I'm half way through "a street cat named bob" Which I'm a bit too invested in to turn off but I'm not sure if I can cope with the jumping and stuttering.

Lil man has yet another cough and can't get to sleep bless him.

And I'm pretty sure I've broken my lil toe. Basically I stubbed it on the ironing board [which just goes to show that no good can come from ironing!!!!] and now it hurts like the dickens and is turning a lovely shade of purpley blackish blue. So yeah that's fun!

Anyways Much Love

Frankie x    


Thursday 27 July 2017

Abakhans Brocade Separates

Shopping, tiddly winks, minion game, whot cards, strip jack naked, mouse trap, batman lego and connect four. That's pretty much how my day went, yerp lots of entertaining of a small child. And just to clarify "strip jack naked" is a card game, I wasn't just stood on the street requesting random men named Jack come into my house so I could undress them......... I only do that on the weekends!

Luckily I've already got a lil stack of projects waiting to be written up/photographed for the ole blog. Because god knows sewing is scarce at the moment!


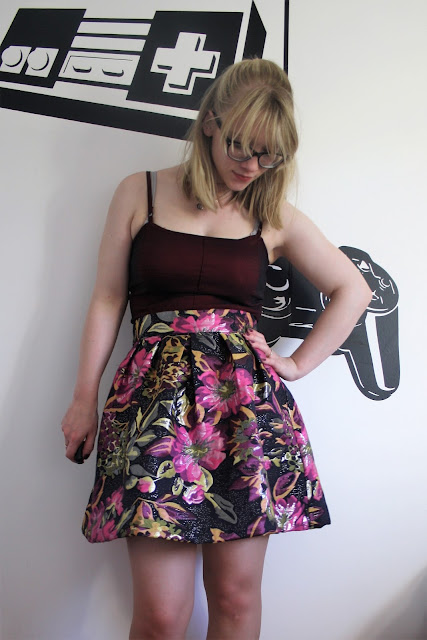
This beauty was actually sewn up a few weeks ago! The brocade was sent to me by the lovely folks at Abakhans and as soon as I saw the the vibrant colours along with the little silver threads that are woven through it I was sold. Love at first sight is a strong word, but if this fabric was sat at the bar on a Friday night I would definitely buy it a drink and put "kiss from the rose" on the juke box. 

  That said it terrifies me for two reasons:

1. It frays like a mother. I mean seriously after two weeks I was still pulling bits of silver out of our dryers lint tray and we all have it on our socks! I would definitely consider sewing/overlocking the edges before pre washing!
2. It is very dressy! Which kind of terrifies me because aside from the school run and the odd wedding I don't get out much! Currently my idea of a meal out involves a big mac and a mcflurry.  


Which is why I opted for separates, because they are 100% more versatile! And as an added bonus they look like a dress when you wear them together! The pattern is from prima magazine [august 2014 ] but you could also use the sleeveless shell top and the box pleat skirt patterns from the GBSB books. Or if you are fancy and go out and stuff go the whole hog and make an awesome dress!

Size wise I measured as a 14 but I cut a size 12 because the prima patterns tend to have a bit too much ease built in for my liking. [My measurements are 36", 27", 38" BTW] I also omitted the waist darts because I wanted a slightly looser finish on the bottom. 

The fabric is fairly heavy weight so its best to opt for something with cleaner lines for example pleats in the skirt not gathers. 


I changed the back from a zip back to a button up back to make it feel it bit more dressy. It also meant I could use these silver buttons I had in my stash [similar here]. I lined the top in a black lining fabric from my stash. This is mainly to keep the insides looking neat and tidy but it also adds a level of comfort. The fabric isn't particularly scratchy but I wasn't prepared to rick any chaffing near my *ahem* nipple area, especially seen as the button back may require me to go braless. 


I like how the three buttons give a little bit of skin without going the full Julia Roberts pretty woman. The button loops were made by hand using thread [the technique for this can be found in the 3rd GBSB book] Originally the top had sleeves as well but it ended up looking a lil bit grandma so I ripped them out and ended up finishing the armholes by hand using a really tiny slip stitch. 


But the best part!!! LOOK HOW CUTE IT IS WITH JEANS! I think I've finally cottoned on to the jeans and a nice top trend all the kids are talking about! Lengthwise I tried it on before I hemmed it because I wanted to go for a classy cropped sort of style. Its the perfect length for wearing with my skinny jeans and the matching skirt as they are both high waisted. You see a lil bit of skin without me feeling like I've got my whole tummy out.

I even think this wouldn't be too OTT for a trip to the cinema or a drink in a nice pub. Lol I'm totally lying I'll definitely be wearing this on the school run because I have no concept of dress codes! 


The skirt is a simple pleated version which is very flattering. I didn't line this but did make sure to finish all of my seams properly. I did two rows of stitching and then pinked them, so far its been through the wash 3 times and it hasn't frayed yet. The main part of the skirt has an invisible zip [This fabric is pretty bulky when layered so a lapped zipper is a no go] and the waistband closes with two press studs. 


I hemmed the whole thing by hand which gives a slightly nicer finish than machine hemming would. It actually means there is no visible stitch lines on this make at all. No top stitching are anything, I tend to think so stitch lines work better on a fabric like this because other wise you can end up looking really over worked.

This is the second attempt of hemming the skirt, the first time I was going for a midi length skirt but then I tried it on and remembered by I don't wear midi length skirts with my short little legs!

Now sadly this fabric isn't currently on the website [it should be soon!] But it is in store as well as some other great brocades! Although for my next version I think I might use a scuba like this one? 

So yeah all in all I love it and I can't wait to wear it to a special occasion! Hopefully we'll be invited to some posh christening/wedding soon! Heck I'd take a birthday party!

Much Love

Frankie

Disclaimer, Whilst Abakhan's sent me this fabric for free all thoughts and ideas are my own! As I always say honesty is the best policy! 


Tuesday 25 July 2017

Knitted Owl Paper Weights!

The summer holidays are fully upon us! And I had forgotten just how much time kids take up! Not that I'm not enjoying it, it just hasn't left me a lot of time for blogging. So far we've had long morning snuggles, watched lots of movies, played football and had a fairly intense game of tiddlywinks! 

I did manage to find some "me time" on sunday though when I popped up to Manchester for a research group practical publishing was running. It was a question and answer type thing with them asking me and about 9 other women questions about our sewing, knitting and buying habits. I found it very interesting to hear what everyone had to say and the other ladies were really nice and as a bonus there were goody bags! [More on that another day]

Anyways today I've managed to find a quick ten minutes to write this whilst lil man sits and practises his reading! 


These are some knitted owl paper weights that I made for lil mans teachers at the end of the school year. Typically we don't do presents for teachers but lil man said he wanted to give them something. And by them he meant all FOUR of them! Yep as it turns out there are four teachers in reception class! 

So naturally I needed a present that was quick to make and didn't break the bank [as it goes these were free!!!!]

I used the same pattern as for my large knitted owl doorstops but I shrunk it down [I am thinking of writing that pattern up if anyone's interested?] then I just weighted the bottoms and chucked in some left over toy stuffing. 

Colours wise I decided only to use my scrap wool, I tried to make the colour combinations as interesting as possible. I think the colours turned out pretty cute. 

I used felt for the beaks, and buttons for the eyes, it actually worked out as a nice way of using up some of those spare pairs of buttons and odd buttons I have lying around.

So yeah that's it really, I hope his teachers like slightly odd stationary! In fact I even had to write on the label that they were in fact paper weights! Mainly so they wouldn't think I had given then some very little heavy owls! 

Anyway Lil man is already climbing up my leg telling me how bored he is of reading and how he wants to play ANOTHER game of tiddlywinks! 

Much Love

Frankie

p.s Hopefully normal blogging shall resume shortly! Wish me luck!

xxx    

Wednesday 19 July 2017

Dress From Another Dress

Things that have made me cry so far today :
An advert for a donkey charity and the donkey couldn't carry any more bricks and collapsed. [also he had sore feet]
Rikki showed me a picture of a puppy [it was very fluffy]
I banged my head on the wall for the second time.

Oh yeah the pms train has fully pulled into the station [ Part of me's wondering if this is TMI but the other half of me doesn't care and just wants to know if there's any chocolate in the house.]


Anyways I made this a couple of weeks ago when the weather was stupidly hot and I still had the ability to do things without crying/murdering people. 

The original summer dress was given to me by Rikki's Nan and I LOVED it! Which is surprising because 1. It's not got a gathered skirt and 2. Its a pale yellow, and I don't typically wear pale colours or yellow! Anyway it was one of those things I tried on and Rikki was like "that looks really nice." And so every summer I wore it to death! It was the perfect mixture of comfy and smart looking at the same time and then it started to give up the ghost. First the hem went, so I cut it off and re hemmed it and then it started to get lots of lil holes in it, the way only really loved items of clothing do.  


Naturally I wasn't about to give up my favourite summer dress so I decided to make a pattern from it. [I haven't taken step by step photos because there are already millions of tutorials on how to make patterns from old clothes on the internet already!] 

First I cut up all the seams, I didn't bother unpicking because I knew I needed to add my own seam allowances anyway.

I made sure to mark key features like the bias bound neckline and arm holes and the ties as well as which was the fabric grain was going.

Next I put my pattern pieces onto a flat piece of paper and drew around them [I folded the front section in half and chose just one of the back and side panels to trace round so everything wold make up. I made sure to add markings for grain line, cutting on the fold, positioning the ties etc. Then I added a 1.5cm seam allowance [I have a sewing gauge that makes this so quick!] and a 6cm hem [I opted for quite a deep hem because I knew I had already removed length the first time I repaired the dress.]

Then I cut those pieces out and pulled this piece of fabric out of my stash so I could make a wearable toile. 


I think it turned out pretty good. The material is some sort of cotton viscose and was given to me by the lady at the car boot. I'm not 100% sold on the print but it makes an okay wearable toile.


The dress is made up of the front panel, 2x side panels and 2x back panels, with waist ties to give it shape. I think the lines of the dress are really flattering but next time I need to make sure I make my ties skinnier and a bit longer as I'd like to be able to wrap then around the front first and then tie them at the back.

The other problem is I stupidly decided not to cut my straps and neck binding on the bias. This means they sit away from the body a bit. It's not a huge issue for this dress but for it to be perfect I need to make sure I cut them out properly next time. I should have done it this time but I thought there was enough give in the fabric to adapt the the curves. I'm also wondering if the binding should be a bit skinnier.


Length wise its right on the the edge of being acceptable so I think I may also add a bit to the length! maybe like 2inches or so? What do you think? I don't want a strong gust of wind showing people the good china now do I?


Here you can see the ties at the back. They just bring it in a bit so you look like you have a waist but by some form of witchcraft they also leave room for burgers and cake and stuff.


As you can see without the ties its a bit sack like! Maybe I should make a version with no ties and then I can just straight up belt it? Eurgh but then I'd have to find a belt in the morning when I get dressed?


All in all I think its a great first effort and I already have some fabric in mind for a second version! I just need to remember to cut the straps on the bias and lengthen the hem and ties!

In other news! 

Its nearly half term YAY! I'm really looking forward to lil man having some time off'! Especially all on the lie ins we are going to be able to have! 

I'm going to the golf driving range later , well at least I think I will. Part of me is like ooh belly cramps stay home and watch Buffy the vampire slayer and the other half of me thinks it will be good for releasing some anger so I don't kill Rikki for sneezing later. Also if I do go I might be able to con Rikki into getting me a mcflurry on the way home, and a mcmuffin......Maybe a Mcbrownie?

Much Love

Frankie 
xxxx

Monday 17 July 2017

The Curtain Dress

When I make a new dress the first thing I do is take it on a "Test Drive" This is to make sure that the dress can hold up to everyday life and helps me sort out things like too short hems and dodgy zips. Typically we go on the weekly shop, mainly because it requires a whole range of movements and lots of walking but it also shows me how badly the fabric will crease when I'm sat down in the car. Now typically I spend most of these test drives wondering if anybody has noticed the step in the waistband or if they can see I've hemmed it a touch on the short side. 

But this time, Well this time I was worried they'd notice it was curtains! 


Yep this dress was once a pair of chintzy floral curtains hanging in my Aunty Shelia and Uncle Gordons house. Now I'm not silly I know they look like curtains but that said I really really loved the big floral print which meant I had to work really hard to make them not look like curtains. Plus we've met me right? I loves an upcycle/free project!


First off all the more pieces the better [well in  my head at least] that would give me a chance to make sure there were no huge chunks of pattern, so for the top I opted for the GBSB corset top from the third book. That meant the bodice was made up of 12? pieces [I have no idea I think there's 6 pattern pieces for the bodice which would make 12 sections but my book is all the way over the other side of the room and would require me moving to check and EURGH movement!] Anyways to try and make the print look a bit more rtw I also decided to do flat felled seams and to use purple thread and a triple stitch. [triple stitch is where your machine goes over each stitch three times, Its very sturdy and shows up well for top stitching but it takes three times as long!]


Mines a bit wobbly, I'm not sure I'm patient enough for triple stitch and going around those curves was hard!!! The bodice is also lined to make it more comfortable it also makes it easier to get a nice finish on the inside and of the straps.

The skirt was a box pleat skirt from the 2nd GBSB book, I liked how the pleats looked with the style of top like a modern dress that you might find in topshop! 


The zip was recycled from an old onesie. I love the bright purple I really think it brings out some of the other colours in the print and it looks good with the top stitching too. It also reaches the whole way down the dress. I love this feature because it feels a bit saucy! Like you can completely zip me out of this dress! Which I was very grateful for after a day of wearing it in the baking sun we had a few weeks ago! Pulling a sweaty dress over your head is not the one. [Not that I sweat, I perspire like a lady]   


Speaking of saucy can we take a moment for the back! I was a complete dolt and placed my straps in the wrong place and then tried it on and was like "OMGOSH my whole back is out! That's kind of cool!" I love love love an open back! I mean granted it means this dress now has to be worn with a strapless bra but its definitely worth it! Next time though I think I need to take a bit off the straps because they were slipping off my shoulders and the idea of them slipping to far and a boob falling out fills me with a horror I can't describe.   


All in all I LOVE THIS DRESS! it just feels so nice to wear! It makes me feel a bit a dressed up but in a casual way! I am definitely going to make another version as well and I'm going to make the same mistake with the straps. In fact I'm wondering how this would look in a dressy scuba as a going out dress? I mean I don't get out much but a girl can dream eh?

In other news!!!!!

I'm actually managing to keep on top of the housework! I mean not the washing and ironing but the other stuff like not having a sink full of dishes and making the beds and hoovering and stuff! I mean you can't have everything right!

I've also officially cracked my sewing and not ironing problem! I listed not pressing my seam as one of my sewing bad habits a while ago and touch wood I've been doing really well! I guess pressing does make a difference after all ! And after reading a fairly terrifying article about a lady inhaling a pin I've officially stopped putting those in my mouth too! 

Much Love

Frankie 

xxx

Saturday 15 July 2017

#ettaquiltproject

Okay so this is a new lil blog thing that I'm launching.

Basically my Grandma Etta is where I got my love for sewing and a good portion of my fabric stash. She was a very talented quilter who did a lot of English Paper Piecing and recently I found a big bag of her cardboard templates. 


And well it made me a bit emotional to be honest, because I was holding my grandmas templates that she had held and made from old cards we sent her. Also in the bag were her notes and some small pieces of fabric. And the whole time I was sorting them into their piles and working out with quilt pattern they belonged to I couldn't help thinking that it would be so nice to use them to make some quilts. But their was so many! And I knew I would never make that many quilts.


And this happened..... 

So here's the plan! I'm going to use my grandmas templates to make 1 sample block of each pattern she had in the bag! I will be sewing all of them by hand either my Applique [which quite frankly terrifies me!] or by English Paper Piecing! And I'll only be using my fabric scraps! 

But here's the fun part! I was wondering if you guys wanted to join in? Ya know keep me company when I'm drowning in pieces of cardboard and I'm cursing the fact that I hate sewing with a thimble because my hands are sore! 
 and if keeping me company hasn't convinced you here's some other reasons you should join in!

 - Hand sewing is relaxing!
- You can use up all of those pesky scraps!
-you can make a family heirloom 
-Or you can gift it to a family member or friend if quilts aren't your jam! 

Now it's gonna be pretty informal because I'm an informal girl! I'm going to post my latest block every two ish weeks until I've run out of templates and them I'm somehow going to throw them all together! [All my blocks are different sizes because of the templates but you can do yours a uniform size if you want!] And if you don't like a block or your busy then skip it! But if you do decide to join in you can tweet me @knitwitsowls or instagram me knitwitsowls and you can use the hashtag #ettaquiltproject. 

Its kind of a go at your own pace sort of sew along? But if you do want to sew with me then I'll be posting the blocks on instagram and you can always follow me on bloglovin so you don't miss a post! And I'll try and post a link/picture to a template you can use at the ends of the blog post, that you can print off to whatever size you want!

Which brings me to the best bit! 

Block #1 - Nine patch

I started with the most simple first! [mine measures roughly 9 inches] 


Template can be found here 

So will you be joining in? 

Much Love

Frankie 

xxx

P.s if your unsure of how to English paper piece theirs some great tutorials online or you can watch my video! 


Wednesday 12 July 2017

Moody Blues Quilt

My life is currently a cycle of :

We have a lot of quilts
We need no more quilts
I have an idea for a quilt
I'm going to make a quilt
This will be my last quilt 
I like this quilt
We have a lot of quilts
We need no more quilts
I have an idea for a quilt..........

My house currently contains 8 quilts/blankets yeah EIGHT! In fact I can offer guests a selections of quilts to choose from. So naturally I made another!


This is the "moody blues quilt" thus named because 1. its blue...... and 2. I was listening to my Chicago blues record whilst I quilted it. 


It started off as a jelly roll form hobbycraft that was a heck of a lot smaller than I thought it was going to be so I had to do a bit of stash digging and that's when I decided to make it a ombre quilt! 

I loves an ombre. As always apart from the jelly roll which I now can;t find on the hobbycraft website to link to, I only used stash fabrics and leftovers. The idea ended up being pretty simple, I cut stripes of fabric the same width as the jelly roll stripes and then laid them all out on my floor fading from dark to light. Sorting the fabrics was very therapeutic, I'm not sure its 100% true to my fading vision but I think its passable.


Next I sewed all the stripes end to end making sure any stripes of the same pattern were not directly next to each other. There was roughly two of each stripe so I alternated them.


Some of the rest of the fabrics are from craft yourself silly, craft cotton company, abakhans and Dashwood studios!


The bees and the fish are by craft yourself silly and are custom print fabrics. 


Quilting wise I backed it with a fleece blanket and just did some simple straight line quilting. I tried to keep it sparse because we don't like our blankets too stiff in our house. 

Size wise its a lap quilt and is lovely for snuggling up under on the sofa! We are also planning on using all of our blankets when we go camping so we can stay warm! 


Verdict? I love it! Its one of my favourite quilts that I've ever made and I love how the colours all correspond together.

In other news:

I've started another quilt!

*face palms*

Much Love

Frankie 

xxx

Monday 10 July 2017

The Blitz Dress - Sew La Di Da Vintage - Review

When I was at the CHSI stitches show I was lucky enough to talk to the lovely Caroline from sew la di da vintage! Mainly we discussed sewing, dolls, vintage and her beautifully curly hair! And afterwards she was kind enough to let me take a pattern home to try! And was very patient whilst I spent a good 20 Min's deciding which one! 


In the end I went for the Blitz dress because its got the easy summer dress style I'm attracted to at the moment! There's something very timeless about a dress in this style and the pattern hacking options are pretty limitless! Its also worth pointing out that all of the sew la di da vintage patterns are drafted and printed in the UK! 


The pattern comes in a large cardboard envelope, which is very sturdy! Its slightly larger than a standard pattern packet so you can definitely fit your pattern back into it afterwards! The pattern itself is printed on paper rather than tissue paper so its nice and sturdy to use and will hold up to lots of wear and tear! The best part though is that the sizes are printed in colour! Which makes it an absolute breeze to cut out! Instead of playing guess which line is my size you just follow your colour!!!   


The pattern measurements are also based on RTW sizing so you can cut whatever size you'd buy in the shops! But seen as shops can vary quite a bit amongst themselves then it is always worth measuring yourself! [It is quite nice though to have your measurements correspond with a size that's familiar, rather than one that's 3 sizes bigger than you thought you were]

I cut out a size 10 because I was bang on for those measurements! Honestly it was almost as though it was made for me! The pattern is sized from a size 6-18 which is a pretty big spectrum.


Now there isn't any recommended fabrics on the envelope or inside the booklet that comes with it. I guess that's because you can make this dress in just about any woven fabric but I know a lot of newbie sewers do like to have a fabric guide to help with shopping. Especially if your buying the 3m of fabric this dress requires!

 FYI I went for a floaty viscose form abakhans, but I think you could make it in any type of fabric that has some drape [The skirt sits a lot nicer if there's some weight and drape to the fabric!] 

 It also doesn't mention needing a zip on the pattern envelope and there no back view to show you were a zip would go, it does however say you need a zip in the instruction booklet and on the website.


The instructions come in a little booklet which is far nicer than having sheets of instructions. Its got several cutting layouts and black and white photographs to correspond with each instruction. The photographs themselves are very clear and for once every single notch in the pattern matched up! This is something that hardly ever happens for me but the notches in this pattern were really well placed.

 One thing to mention though is that the dart for the bodice lining isn't marked like a traditional dart. Instead its marked by two notches and a dot and you have to join it up yourself [its definitely worth drawing this straight onto your pattern when you've worked out where it goes]. This got pretty confusing for me because there two other notches just by the dart notches! 

The other issue was the the collar piece with the pattern doesn't appear to be the same shape as the one in the instructions. Its not a problem as the new collar piece fits, its just worth mentioning in case anyone else has a "omg have I cut this out wrong?" moment!  


The pattern calls for an invisible zip but I decided to do a lapped zip because it seemed more true to the vintage style of the pattern. Plus I didn't have a invisible zip that long! 


The pattern has some great features like darted sleeves [although naughty Frankie just pleated hers instead of darting them so there'd be more of a poof at the top!], a collar and centre split [but if you want to wear it with the collar not done up then you need to line the bodice in the same fabric as you use for the main body of the dress, I used a different one and now a flash of pink peaks through when the collar is open]. The bodice bust has gathers instead of darts and is lined! 

All in all its a really nice pattern. I love that its vintage but not too vintage. Its a pretty easy sew but I think you would need to have a few dresses under your belt before you make it otherwise you might get flummoxed by the instructions, They are not hand holdy in the same way as other indie patterns can be [for example it doesn't tell you when to press your seams etc, much like the big four patterns] , so I'd say its more suitable for experienced beginners or beginners who have access to an experienced sewer! 

It does make a beautiful dress though and now I might have to treat myself to the other patterns in the range or maybe one of their fabulous doll kits! 

If you get this pattern let me know how you get one!!

Much Love

Frankie 

x
Sunday 9 July 2017

Sewing Room Tour - Latest Youtube Video

I am trying to do the whole youtube thing but its very time consuming. I think I'm going to sack off the "what I made this month videos" and stick to reviews, pattern hacks and other stuff. The what I made videos just seemed to be me repeating what I'd said in my written blog posts! 

Anyways here's my latest video showing you guys the area I sew in! 

Fair warning its less of a sewing room and more of a room that houses sewing stuff!


Enjoy!

Much Love 

Frankie 

xxx

P.S if you have any ideas for youtube videos let me know!!! 

Saturday 8 July 2017

£1 Make Your Own Dream Catcher from The Works - Review

Whenever I see cheap craft kits I'm immediately sceptical. I mean how on earth do you make a craft kit for £1? I get that companies buy the bits in bulk to save money but that is some serious bulk!

Anyways this craft kit was from "the works" which is pretty much one of the best shops in the world! Not only do they sell books, but they have stationary, art supplies, craft stuff and countless other things I didn't know I needed until I walked in!


So £1 for a dream catcher seemed like a bargain.


Everything came contained within the kit, the hoop is made of metal so its pretty solid and there were a good amount of feathers in fact I didn't use them all! The only thing in the kit I didn't like was the bull head pendant that was meant to go on the middle strand. The bull just looked a bit mean so I swapped it for a mother of pearl effect pendant from my stash!


Here's the finished product, the only real issue I had was that there wasn't enough suede ribbon to completely cover the metal hoop without having gaps so I had to underline mine with some gold ribbon from my stash.


Th feathers were pretty fiddly to attach but I think if you dipped the ends in pva glue they would be easier to work with. Even the weaving was pretty easy, there are not a lot of instructions but I think its enough for a 10 year old and up to get on with. The weaving was actually very therapeutic but I was a bit gutted that my bead placement wasn't great!   


So yeah one finished dream catcher all for the princely sum of £1! I'd definitely recommend these as a summer holiday craft project if you have bored teenagers/tweenagers in the house! [anything to stop them whinging eh?] 

In other news:

Lil man got star of the week at football! #proudmummy

And I had a cracking record score in our local charity shop! Number one they actually had some decent records in like "Fleetwood Mac!" Instead of just the 300 copies of the sound of music and kamal! But as I was giving them a clean when I got them home a 45 fell out of one of the album sleeves! Well initially I was furious because OMG IT MIGHT HAVE SCRATCHED THE EAGLES AND HOW WILL I LISTEN TO TEQUILA SUNRISE! [my dad always taught me that you store records separately in their appropriate sleeves and that you put them away properly after each use!] Anyways I put it on the side to give it a quick clean , cleans the b side without really paying attention flipped it over and well lo and behold its only a copy of the bohemian rhapsody single by queen! I did a complete double take and ran squealing to my record player to see how it played.

Beautifully. it plays beautifully. Like its spent its whole life in some sort of record spa! 

Much Love 

Frankie 

xxx