Showing posts with label tutorial. Show all posts

Sunday, 29 January 2017

Pink Spotty Baby Bunny

Heya Folks hows it going? Coping with the weather? Me and Little Man were both snivelling wrecks by the time we got to school on friday apparently the only thing that can make the cold worse is having the wind blow it right into your face! 

But anyway this is a project I finished a while ago. My sister requested I make one for her to give as a baby gift. She knew what gender they were expecting so after I sent pictures of some fabric ideas and she okayed them I got cracking.


Both of the fabrics are by Dashwood studios, the pink spotty fabric is called flurry and the brown flowers are from the Suffolk garden range. They really are lush fabrics to work with and the colours are just so beautiful and vibrant! 


I didn't make any changes from the pattern apart from adding a small handmade tag to its back ear! 


It was a nice mindless sew to be honest and I'm hoping the recipient likes it! It did take me a while to choose colours for the face and the bow though but I think they turned out pretty cute!


In other news , I appear to be sleeping better but I'm sick of this weather. I literally cannot wait until I can start sewing cut summer dresses again!

My crochet blanket is coming along nicely and I'm hoping to have it finished soon. I've told myself I can;t start my new knitting project till its finished so hopefully that will motivate me! Although when I've finished crocheting all the squares I still have to attach them all together!!! 

Much Love

Frankie

Monday, 5 December 2016

Easy Diagonal Baby Blanket


I loves a easy baby blanket and this one is an absolute breeze to knit. You can ritz it up by using posh stitches are you can keep it simple like I have and use garter stitch!

You can be fancy and buy some lush chunky wool or you can be thrifty like I have and use odds and sods from your knitting basket doubled up!

And in all seriousness if you find yourself in a tight spot you can bust one of these out with like a day of solid knitting!!!! 


Anyway here's a brief tutorial on how to make this blanket.

Garter Stitch Diagonal Baby Blanket

*Use 6mm needles
*Use chunky wool or two strands of regular wool

*Cast on 3 stitches
*Work each row in garter stitch increasing 1 stitch at the end of each row
*Continue knitting in this manner until one of the shorter edges of the blanket is the width you would like your blanket to be
*Now decrease 1 stitch at the end of every row until only three remain.
*Cast off
*optional* crochet a border


In other news! Boy was it freezing this morning! I honestly felt like my toes might drop off! 
I am however wearing a pretty snazzy new make in the hopes of photographing it later so that cheered me up!
And I posted a new video this week of what I'm planning on making in December! 

Obviously though I've not included Christmas presents because that would ruin the surprise!!!!


Much Love

Frankie

xxx


Tuesday, 27 September 2016

Five Tips For Sewing Circle Skirts!

Whether its sewn to a bodice or just as a skirt on its own, you can't deny the awesomeness that is circle skirts! 

The draping! The swishyness!!!! 

But they can be a bit tricky to sew! so here's my top tips!


1. Choose your fabric - make sure its a medium or lightweight fabric as heavy fabrics don't drape well!


2. Be gentle - don't drag your fabric around like a caveman! Because you'll stretch it out!!!


3. Stay stitch your waist seam. because your waist will be cut both on the bias and on the straight grain it will stretch. So stay stitch unless you want it stretched out so you can gather it! 

4. Let it hang! Once its all sewn up place it on a dress form or coat hanger BEFORE you hem it! Circle skirts tend to stretch and end up with uneven hems so let it rest! I tend to go for about 48 hours if I have time! Then after its rested even it up!


5. Pick your even carefully, because its a circle they can be pretty tricky to hem but here are some easier options! Narrow hem! Using bias binding to hem [I love this method because its so quick] and hem by hand I tend to do this for fancy makes and do a 1cm hem and dainty stitches!!!

So do you have any tips for sewing circle skirts?

Much Love

Frankie

xxx


Sunday, 31 July 2016

DIY Anxiety Bands

Its a change from my usual sweetness and light posts, but I figure if something as silly as this can help me then chances are it will help someone else.

I've had anxiety since I was about 13 years old [which I've just worked out means I've been dealing with feeling less than human for 10 years, seriously I can;t believe there's people who get through the day without feeling worried or anxious! In fact I can't believe that at one point I was one of those people]

I get anxious about lots of things, meeting people I don't know, Big crowds, Meeting people I do know, Getting sick, Being sick, What people think of me, The dentist, The doctors, The supermarket [I know even I'm embarrassed at myself], Travelling, Being a good mum, What people reading my blog think...... the list goes on.

Basically I'm a bit of a mess, I'm not sure why it started. But it hasn't stopped and it likes to team up on me with my IBS in the evil circle of, "am I going to have an IBS attack?" panicking about having a IBS attack and then the stress resulting in one. That coupled with severe acid reflux and I'm a walking perscription.

Now this isn't all doom and gloom, I've got a lot of coping mechanisms now and I'd say about 60% of the time I actually feel like a proper person [which is the highest its been in years!]. Anyway one of my coping mechanisms used to be writing motivational things on my wrists in biro. However I'm a grownup now, and nothing quite says stare at me like having "Be Brave" written on your wrists.

So I had to come up with a new solution just for me [actually I came up with this whilst having a panic attack about having to take lil man to the doctors and wondering if last nights takeaway was going to give me food poisoning]    


So I made some wrist bands out of some old fake leather I had knocking around, you know the stuff that doesn't fray and is quite soft?] 


The only sewing I did was putting on a button, I didn't even sew the button holes I just cut them. The bands are 3cm wide and I just kept trimming till they say snugly on my wrist.


I sounds weird but I just wanted something that made me feel a bit less like a scared little girl hiding in the corner and more like a gladiator/Xena/Khaleesi badass. 


But this is the best part, my motivation I'm going to be okay stuff is hidden on the inside, just for me to see. 

I feel a bit calmer and a bit more human. But that could be because I actually did something rather than sitting and wallowing in my own self pity. 

Anyway I thought if it helped me it might help someone else! and if its doesn't they still look pretty badass!

Much Love

Frankie  

Sunday, 24 July 2016

Knitted Diagonal Baby Blanket - How to!

Okay so this is my go to baby blanket pattern, Its quick its easy and you can use scrap wool if you want which is a glorious thing in the knitting world! Because all of those wool scraps add up!!!


Anyway this one is for my sister in law and brother, so I used all the colours!!!!


So here's how you do it!

you will need:

scrap balls of wool [it helps if you sort them into colour order, like a rainbow!]
your biggest knitting needles [ I think i used a size 5 or 6?]
a couple of free hours [and a good box set!]

1. Sort all of your wool into rainbow order

2. Grab your first two balls of wool and tie the ends together. cast on 3 stitches and treat these two strands as one. [you will continue to knit the whole of the blanket using two strands so the colours will "fade" into each other. Now the cool bit is one ball will inevitably finish before the other so then you just tie on your next ball of wool! this is what creates the ombre effect!]

3. Using your three cast on stiitches, knit 1 row and increase 1 stitch at the end

4. Continue knitting a row and increasing 1 stitch until your width is approximately 70cm or more if you'd like it to be longer!

5. Knit one row

6. Knit 1 row and decrease one stitch at the end.

7. Keep knitting a row and decreasing one stitch until three stitches remain

8. Cast off your last three stitches and weave in ends!

9. You can also add an optional crochet trim! which I did because I ran out of wool!!!!


Its such a versatile pattern! Heres some ways yo can make it your own!

- use a different stitch! try stocking stitch or moss stitch!
- Instead of two strands use chunky wool!
- Be eco friendly and recycle tshirts to make tshirt yarn! [this might be a lil thick though!]
-Knit all in one colour for a more neutral feel!
- Skip to colour ordering and just use one colour scheme like various shades of pink or blue! 


Hopefully the mummy and daddy of my new niece or nephew will like the blanket! I personally like the bright colours because OMG so much fun!!!!!! But I think they will because they are bright colourful people!


My only regret is that it isn't bigger but I think it will work nicely for a car seat layer or a Moses basket one! I wish I could have knit it bigger but I ran out of wool! Which is pretty hard to believe considering I used scraps!!! 

Im going to cast on another one of these tonight, But I can't decide which colour scheme to go for, blue or pink? 


Maybe this time I can make it bigger!

Much Love

Frankie 

xxxx


Saturday, 2 July 2016

Crazy Baby Bibs!

I love my sister in law. She has zero fear of print, colour and embellishment! Even if its all in one outfit! Which is why I knew I could go as crazy as I wanted when picking fabrics for her baby bibs!


First of all I picked a scrap of african wax print to make this bib that's actually pretty dammed awesome looking!


And I backed them both in this awesome diamond print because as I said she has no fear of colour!


And then I did a slightly tamer one in a piece of owl print. because well red and sparkly doesn't go with everything! [this one badly needs an iron!]


But I still backed it with the crazy diamond print! Both bibs are reversible, and close with press studs. I used my own pattern and ran them up in about half an hour. I might make a few more yet but I think twos a pretty good start for the baby's gift hamper! 

Much Love

Frankie 

xxx

Tuesday, 28 June 2016

New Baby Bunny!

I don't want to alarm you all but......

I'M GOING TO BE AN AUNTY AGAIN!

Seriously was there a power cut I don't know about? everybody seems to be popping out the babies!


Anyway I've already started its gift basket in fact its what this quilt top is for! 


I've tried to go pretty neutral on the bunny, both of the fabrics are from the craft cotton company. and as a nice touch the triangle fabric that's on the body is on the bunnies I made for its elder brother and sister for Easter.


I used my own Easter bunny tutorial, and didn't make any changes. I was tempted to make a mouse but its mum and dad requested a rabbit.


I'm very pleased with how it turned out I'm just wondering if I should change the ribbon round its neck for something darker? 

And I've already decided if its a girl I'm going to put a tutu on it!

Frankie

xxx


Tuesday, 12 April 2016

Making a Pattern From Old Wrecked Clothing

This is a brief "how to" on making patterns from your old much loved clothing! NOTE: As this method requires cutting up then its not suitable for clothes you want to continue wearing. [as if it wasn't obvious when the instruction reads , cut it up!]


The top I decided to use was this one I was given by Rikki's Aunty, I loved the top but after a few wears lil man slammed into me as I was pouring blackcurrant double strength high juice and the stains just wouldn't go. I tried anything! But I loved the top as its the perfect length at the back to wear with leggings and jeggings. 

First of all try on your item, make notes about how the hems are finished and about the construction. Does it have darts? Are their gathers? Whats the closure like? [ It might even be worth taking a picture in it for future reference] Luckily for me this top doesn't have anything complicated so I could crack on. 


Cut into pieces, This top was over-locked so I just cut all the over-locked seams away and was left with four pieces. You can unpick if you want but I find it easier to just trim the seams off as I add my own seam allowances later.


Find the centre of the top by folding it, this way you can cut all your pieces on the fold. I like to pin the two sides together so they don't shift around. Folding your front and back pieces in half means both sides of your top with be symmetrical.


Do the same with the back lay them down on a big sheet of paper and draw around them. I don't tend to buy pattern paper instead I used newspaper, wrapping paper, left over wallpaper or greaseproof paper! Remember to add your pattern markings for grain line and cutting on the fold etc.


Next discard one of the sleeves as you'll only need one to make a pattern from [top tip: make a note of which side is the back of the sleeve for when you come to draw it.] You don't need to fold your sleeve over because very often the front and back of sleeves are slightly different due to ease. Next add a seam allowance to all of your pieces [its your choice here so use whatever seam allowance you  comfortable with]
 I have a seam allowance tool that I was given but you can just measure all the way around with a tape measure and join up the dots. Remember you wont need to add seam allowances to your fold line, just to the areas that will be stitched.


Next I cut out the pattern and sewed up a muslin.


At one point I thought it might be wearable so I added a lil pocket. Now you have made your own pattern you can make whatever tweaks you like with regards to length and fit. For example I'm going to lower the neckline and give myself a lil bit more room in the body so its more blousey.


I completely jacked up the bias bound neckline by pulling it too tight, In fact I may draft a facing for a cleaner finish.


But all in all I'm pretty pleased!

Do you have any tips for making patterns from old clothes?

Much Love

Frankie

xxx


Saturday, 12 March 2016

New! Easter Bunny Tutorial!

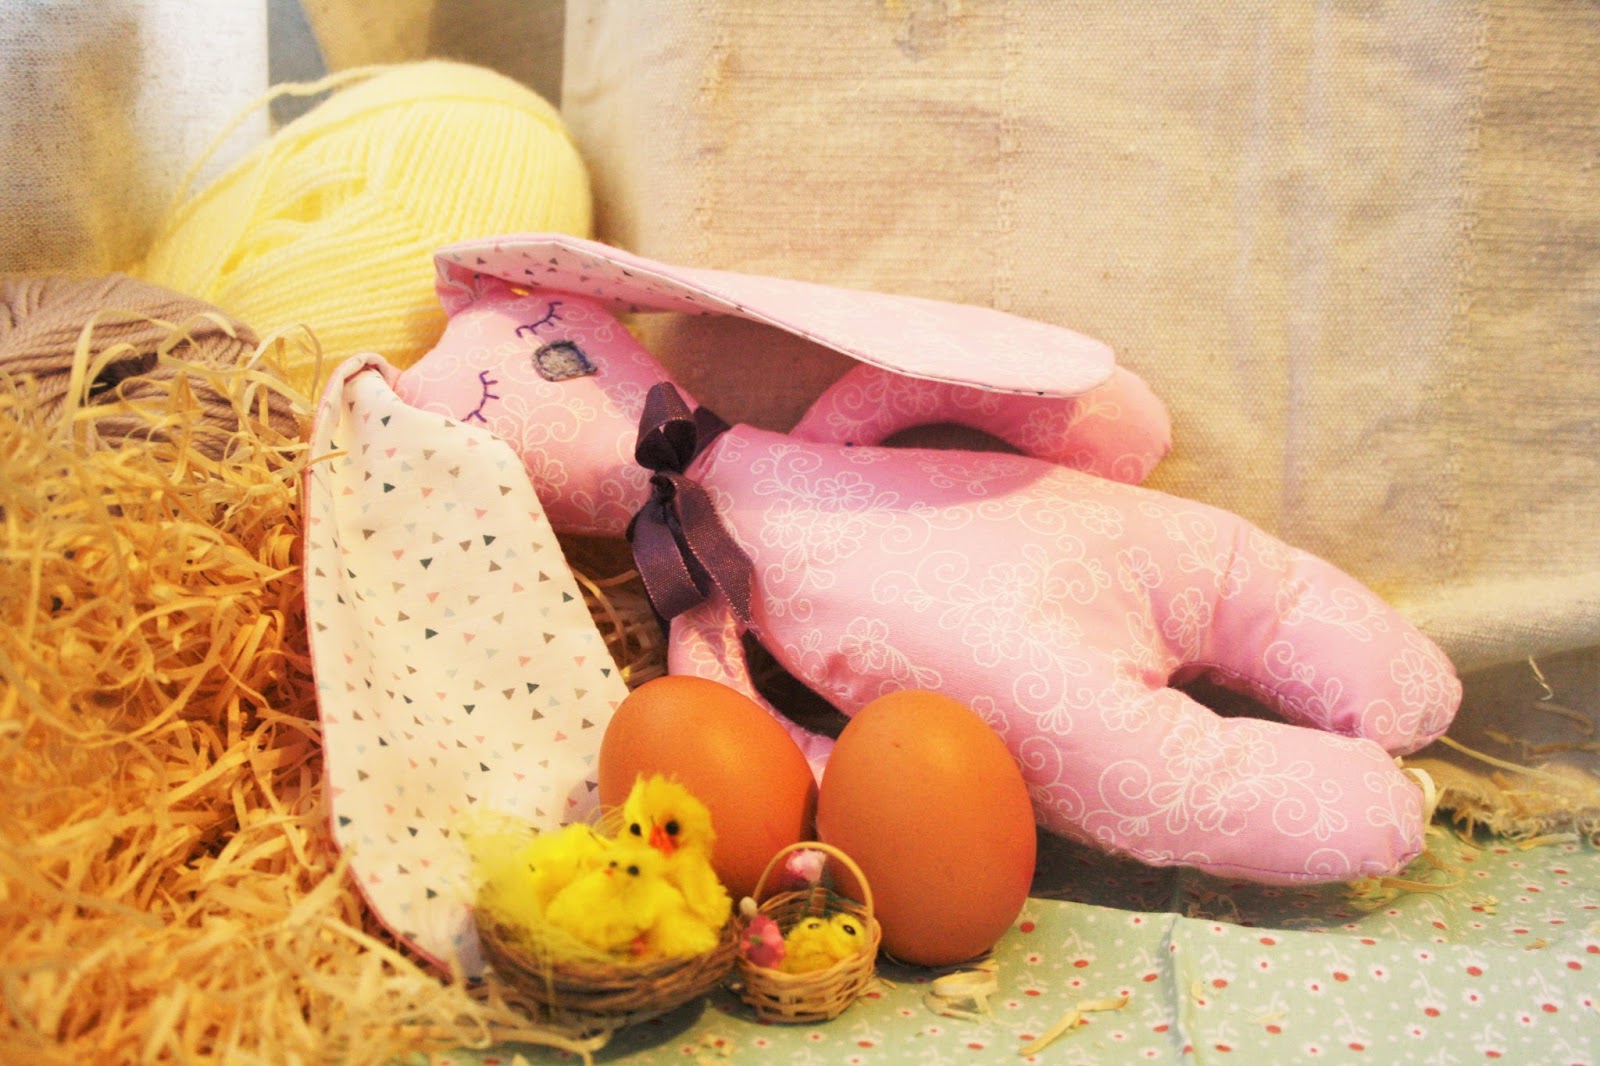
My latest tutorial is now up on the craft cotton company website! and this one is all about Easter!


These are from the official bunny photo shoot that I did, and yes I had to go to the shop for eggs!


You can find the tutorial here : https://drive.google.com/file/d/0B3W6ct5H1sa7aVRNWWhJSFoyQ2s/view

And now its gone up I can show you some of the other bunnies I've made! 


This was the first bunny prototype i made to see if the idea would work.


then i made this one experimenting with the idea of adding arms , I think it looks cute with and without though!


Then 1 made one in more boyish colours!


And my final versions! Mr and Mrs bunny! All ready for Easter! And they made lovely gifts for those who don't eat or like chocolate! [or who are too young to have it!]

Hope you like them and if you make your own please send me a picture via email, or twitter or tag me in one on instagram!

Much Love

Frankie

xxx 

P.s The Pattern can be found on my patterns and tutorials page!