Showing posts with label upcycle. Show all posts

Saturday, 3 March 2018

Sewing Box Makeover


This is what my sewing box used to look like. It was very kindly given to me by my friend when she was having a clear out before she moved. 

Now from what I can remember she'd had it for some years and I've had it since may last year and it was starting to look at little worse for wear. 

One of the main issues was that one of the hinges on the top section was broken and some of the screws had come out and gotten lost.

So I went to Rikki batting my eyelashes and he agreed to fix it. And then he suggested that we just pull the whole thing apart and re paint it because some of the paintwork was chipped and fading. 


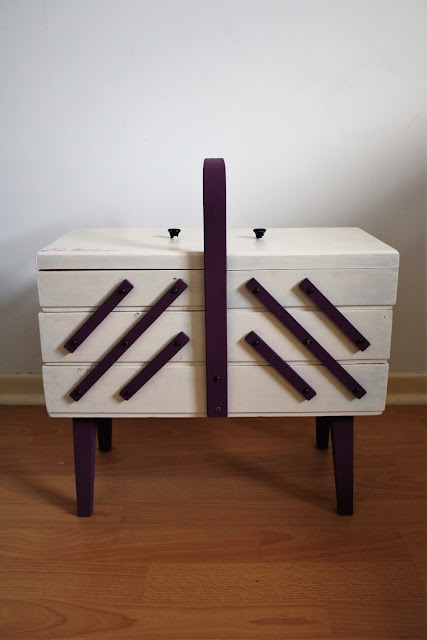
And that's how my swing box ended up looking like this. 

First of all I had to empty the dammed thing which led to another "why do you have so many pairs of scissors?" discussion. FYI I want at least one more pair but I want really really good ones this time not cheapo ones!

Our agreement was he would pull it all apart and glue the bits that needed gluing, then I would sand it and paint it, and then he would put it back together and fix the hinge and stuff. 

I genuinely thought I had the easy part........I was wrong.

THE BLOODY THING TOOK ABOUT 5 HOURS TO SAND! 

Honestly my right arm is like pop eyes now and I worked muscles I never knew I had! luckily we have this weird sander tool thing where you stick the sand paper on the bottom. I can't find our exact one but this one is similar and I'd definitely recommend it for this sort of job. I did think about using our electric sander but its quite big and bulky and I didn't want to damage the box beyond repair. 


After the sanding I gave everything a good wipe to get the dust off and started painting whilst it was disassembled. The white paint is some silk emulsion that we had lying around and the purple is a tester pot that Rikki popped out the get whilst he was getting a new hinge [he actually colour matched it too our living room perfectly!] It took four coats of white to get it looking nice and three of the purple.  


I painted the bottom of the box and the lid purple as well because I thought it might help me find stray pins. I left the sides bear because some of them contain makers marks which I thought was a nice touch.


The handle was especially fiddly to paint because I had to have it half propped up. The little wooden extendy bits [I have no idea what I'm talking about can you tell!!!!] Because they are only about 1cm wide I ended up with most of the paint on my fingers. 


Some of the purple paint came off on the white paint the first few times we opened it but its stopped now so now I really need to touch them up. 


I also added my signature to the front in sharpie but its not very neat so I'd like to cover it in a little metal or wooden sign instead. 

And then we put the whole thing back together again! 

I've got to say I love it! Its surprising how far some elbow grease and a bit of paint can go. And its so nice to breathe life back into something. Especially seen as I've become quite attached to it! I just wish it was a bit lighter so I could take it with me when I do demonstrations! 

Speaking of which.......


This was me today! Yep I braved the cold and went to Abakhans Hanley to demonstrate the things you can do with EPP hexagons! 

Whilst I love the sewing part the best part is chatting to people! 

I met a couple who had been married for 62 years [yes they were adorable, they met at the cinema]

A lady who's daughter owns a pub in Staffordshire that has quilts on the wall and that I am definitely going to visit! I mean booze and quilts? Does it get better?

I also met a young girl who had started sewing. She was only 9 but had made a quilt, clothes for her dolls and is about to try and make something for herself [I believe she said a skirt] She left me completely in awe and she has a lot of talent so I hope she sticks with it!!! Especially in a world where so many schools are being forced to cut back on textiles and other hand crafts.

My next one is on how to make an embroidered cushion and its on the 21st of April!

Much Love

Frankie!

xxx
  

Thursday, 3 August 2017

Cami Top from a Pillow Case

Sometimes the sewing works and sometimes it doesn't. Yes this is a nice enough cami top but for some bizarre reason it turned out HUGE! compared to the other times I've used this pattern.


The pattern is the cami top from the 3rd GBSB book, but without the ruffle because well putting a ruffle on my boobs would just be overkill.  


Its the back that seams big? maybe I should put a little box pleat in or something? In this picture I have the back of my bra pulled right the way down so you don't see it. So maybe that means the strapos are whats too long? [do you like my tan lines? I took these pictures the day after I got sunburnt which was ages ago! safe to say I'm now back to my milky white colouring]

That said if I don't alter it I'm sure I'll still use it for layering under tops and if all else fails I'll just wear it to bed.


Construction wise it took no time at all to cut out or sew. It was however sat on my chair for about a week after cut out waiting to be sewn because new shiny projects kept distracting me! 

The fabric is an old pillowcase and came from my Aunty Shelia and Uncle Gordon's house. There was only one otherwise I might have tried to make a little pj set. I love the delicate flowers and the lightweight fabric. I'm gonna guess that its vintage? 


It looks 100% better tucked in!

Their wasn't quite enough fabric to cut the facings as well so they have been done from a plain white fabric. 

All in all its a really nice make and its always nice to make some more practical items that will get lots of wear. Especially when the weather turns colder and I'm looking for an extra layer to keep me toasty. The only issue is its a little bit on the sheer side so I have to be careful how I wear it.

In other news, 

The summer holidays are going okay I'm not ready to kill lil man just yet......

We are still playing lots of games and trying to get outside whenever the weather lets us. We have high hopes for a big bike ride but I'm not sure how realistic that is!

Much Love

Frankie

xxx


Saturday, 24 June 2017

Gingham Circle Skirt

I feel like to be a proper British person I need to start this post off by mentioning the weather.... I mean haven't we just had it all?! The blazing sun followed by pouring rain! High humidity and then this morning it was actually chilly!

Anyways I made this skirt a lil while ago but I've gotten out of the habit of posting regularly, what can I say after a day of trying not to melt I'm pretty beat!


The fabric came from my Aunty Shelia and Uncle Gordons house, my mum and some other family members went to clear it out recently and they were kind enough to set aside a lot of their vintage linens for me. This was a table cloth, my mum said they must have found at least 15 whilst clearing out so as you can imagine they were all in pretty good condition, This had one small stain that came out during pre washing. The fabric appears to be some sort of cotton/linen type stuff?


Its a pretty cool gingham design and their was just enough to make a simple circle skirt. For  the waistband I used fabric from my stash and I decided to have a button front rather than a zip in the back. Mainly because I'm running out of skirt zips and couldn't be bother to go out. 


I reinforced the front placket with hemming tape, this just meant I had something a bit more stable to put the buttons onto! The waistband however was too thick to put a buttonhole into so that closes with a press stud instead. 


I am wondering if its bit short? Like I feel like I'm young enough to still be wearing short skirts but I;m also a mum so I bend down a lot???? 

But yeah all in all I love it! It does make me a bit sad to look at it though because it came from their house and its one of their things? I did feel a bit bad about cutting up one of her table cloths especially considering what good care she took of her things but I actually think she would have been quite tickled at the thought of me making a skirt from it.

In other news! 

This week ended up completely jacked up! We had a lovely visit from Rikkis Nan and Grandad on the Tuesday and then on the Wednesday lo and behold Rikki wakes up feeling rotten [we suspect tonsillitis] which put paid to our weekend plans! The idea was providing we had nice weather we would go camping and if we didn't I'd take the train to the new Abakhan store that was opening and have a day to myself and hopefully spend enough money to snag myself a goody bag! oh and try and get myself a signed copy of Jenny Taylors new book!! As it goes Rikki being ill meant we couldn't do either!!! Not a happy bunny! Actually that's an understatement, the combination of missing out on fun things, a ill husband and a miserable child left me in what I can only describe as a foul mood. I did apologise after all its not Rikkis fault he's ill [it is his fault hes a baby about it....].  

And the freezer broke! Rikki left it open one night and then It didn't work properly for 4 days so now we've had to throw away a metric tonne of food and restock! All whilst crossing our fingers that it doesn't break again! 

BUT all is currently well, I've just had a bath and a KFC and now I'm watching Clint Eastwood in escape from Alcatraz so all is well!

Much Love

Frankie

xxx


Thursday, 10 November 2016

Aztec and Black Long Sleeve Top - Operation Stay Toasty

 Project lets try not to freeze my backside off on the school run is going quite well, Im not in possession on three long sleeve tops, 2 handmade and 1 rtw. The school run is still as cold and this morning I had the added bonus of rain! But one of the Grandad's was nice enough to drive me home so I didn't get completely soaked!


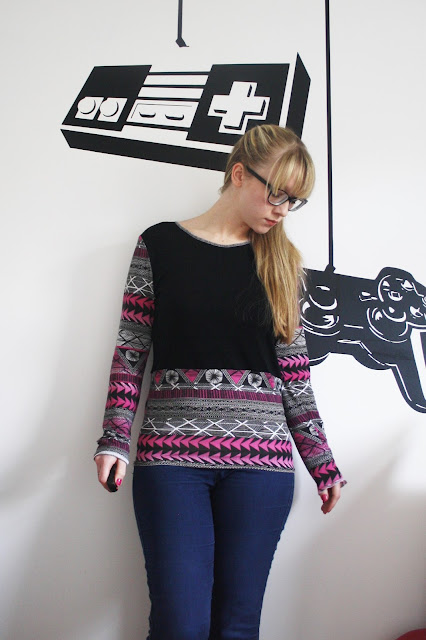
Anyway onto this top! I used the same threadcount cardigan as last time and just cut the front and back on the fold. I used an old aztec print dress and the skirt part of an old dress for the top so its recycled! The only issue I had was I didn't have quite enough fabric for the full length of the body. And keeping it as a crop top would have defeated the point of operation stay toasty! So I added the bottom of the dress on the make it a bit longer.


The fits pretty similar but there is some bunching around the seam where I had to add the extension. I do kind of like the look of the black and the print colour blocking that's happening.


It was a pretty simple sew, It took about an hour to cut it out and sew it up on the overlocker. I just overlocked all the edges again to make it a super speedy make.

In other news, I am super super tired, which I'm blaming on the stupid weather. Its making lil man grumpy as well, yesterday he whinged the whole way home because he was cold :(

I've been getting lots of sewing done and I think I've finally restored the balance between cleaning and sewing after or honeymoon and wedding!

And I've had a couple of very good post days!

Frankie

xxx


Sunday, 17 April 2016

Two Shirts into One Shirt dress Refashion

I LOVE refashioning shirts! There are so many refashioning possibilities from one garment.
 I do find it hard to find nice shirts for refashioning though, I'm not a huge fan of trawling through the rails of my local charity shops [think less quality shirts and more tracksuits with juicy on the behind]
So instead I have to look to either Rikki who wears the same size shirt as me or my Dad [He doesn't wear the same size as me............]

Luckily for me my Dad was getting rid of a few shirts...... because I made him. And even luckier two of the shirts were exactly the same. FYI shopping with my dad is absolute hell so he must have REALLY liked these if he ended up with two!!! 
  

They are good quality shirts that require cuff links, made from cotton and have DEHAVILLAND written in the label which means nothing to me!


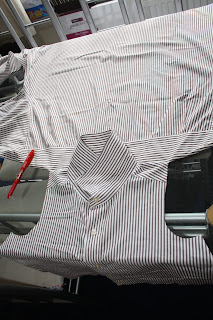
To start off I laid my shirt flat and got out my Lilou bodice pieces. Next I lay the pattern piece so the fold line went along the centre of the buttons on the button placket [I decided to use the button placket as my opening]. Then I transferred the pattern marking and flipped the pattern piece so I could do the same on the other side. If I were to do this again I would leave myself a bit more room for gaping, so I'd go from one side of the buttons instead!


Next I cut of the single layer of my shirt front and cut straight across the back yoke where to make a halter neck shape. 


Then I chucked it on my mannequin to check my theory worked. 


And then used what was left of the back to cut out my back bodice pieces [I omitted the seam allowance on the back centre seam and cut them on the fold.] 

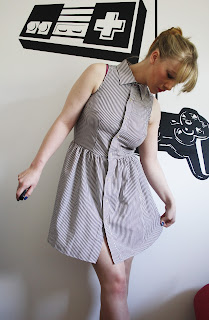
The skirt was made by using the second shirt and simply cutting a straight line from the bottom of the arm to the bottom of the other arm. then simply I gathered this and added it to the bottom making sure to match up the button plackets and side seams.


I used the arms of the shirt to make bias binding, which I used on the arm holes and the back. And I don't want to excite you too much but I didn't even have to hem it! Just used the original shirt hem! 


I've gotta say I really love how it looks! I could do with a bit more ease in the bodice but I am carrying a little bit of Easter width! Those pesky chocolate bunnies making me eat them.


I love the cut out back detail! It's so cute, I finished the edges of this with bias binding as well!


The pinstripes on this are making my eyes go west! It's kind of a white and darkish brown colour palette? Typical business man shirt sort of thing.


The bodice fits better open, in fact a slightly different bra might help? Jeez its hard being a lady so many things to think about!


I think I'm going to be wearing it with this belt a lot for a lil bit of waist definition. The belt is also thrifted from a skirt! 


All in all I really love it, I've been wanting a shirt dress for ages and I love the relaxed style of this, it's pretty short but I think I can get away with it [please excuse my pasty skin I don't tan]

It was so lucky that I had two of these shirts to make this with although it might look cute with two shirts in different colours and doing some colour blocking. It could also help with adding some length! 

In other news, Lil man is back at nursery and I'm not pleased because he was fine over the two weeks! Not so much as a sniffle and then one day back and he's coughing and spluttering! Who are these germ infested children! And why aren't they keeping them away from the healthy ones!!!

Anyway I guess that's just what happens when you get large groups of toddlers together, and on the plus side if he passes it on to Rikki then they have to go on bed rest and I'll have lots of time to sew!

Now I just need to decided what to make next, this was pretty spur of the moment!

Much Love

Frankie

xxx


Thursday, 14 April 2016

DIY Camera Bag

I'm still working my way through a few items I pulled from my wardrobe to up cycle! This bag was next on the list, nothing in particular wrong with it apart from some slight staining on the front.

I was inspired by the fun novelty bags you can get now and decided to turn it into a "camera bag"


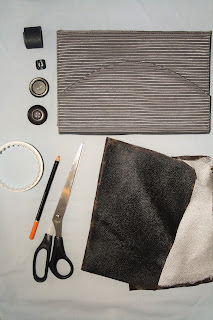
I laid out my materials [I painted some old leather in silver and black using revell modelling paints]


And found some inspiration!

Then I had a play around with making a camera effect using the materials!


Then Finally stuck everything down using my glue gun!
I think in total the whole project took about an hour maybe? It was very quick and satisfying! 


I think you can just about tell its meant to be a camera but its not as good as my moustache bag that I made when I first started blogging. 

Mainly I used old pieces of leather, and a red button for the flash but now I'm thinking I should have used felt and it would of looked cuter.


I think the overall look could be more polished I probably should have taken a bit more time over the whole thing rather than just bust it out because I was bored and needed something to do!


I'm considering add a strap and maybe trying to neaten it up a bit, but I'm not sure if I'm that bothered because I tend to just use the same few bags! 


So yeah I'm actually feeling a bit more blah about it the more I look to be honest. And now I'm annoyed because I used the last of My glue gun stitcks on it!

Much Love

Frankie

xxx

Saturday, 9 April 2016

DIY Shoe Refashion

 Let me start off by saying I LOVE these shoes. I mean if I had to choose between saying Rikki from a burning building or these shoes, some days, just some days I would choose the shoes.

They are so comfortable its unreal, these shoes have never left me with blisters and a drunken Frankie once walked home from the pub wearing them. YES! wearing them, not carrying then in her hand, not balancing them on her feet whilst receiving a piggy back. Actually wearing them.


These cheap primark heels have seen many a night out, day trip and a very special wedding where I was taking all the pictures. YES! all the pictures and they coped through that too!


 Which is probably why they are wrecked, the heels or wrecked the toes are wrecked. But due to the fact they don't wreck my feet, I decided a quick spruce up was in order! And luckily for me the faux suede of these shoes was easy to refashion.


A good paint job can hide a multitude of sins! I'm using Revell model paint that was left over from some models Rikki built. I love that it comes in both matt and metallic colours! For this project I used silver and matt black.


And took my inspiration from shoes with contrast metallic toes, I think Kurt Geiger and Chanel made some.


First of all I taped off the toes and painted the main body of the shoe black. I had to do two coats for even coverage.


Then with a steady hand I pulled off the toe tape and painted the toes and heels metallic silver. Again I had to do two coats for even coverage.


Next I painted the soles red, al la Jimmy Choo. To be honest might do this with all my shoes because it makes me feel 100% more classy!


I think they turned out pretty BOSS to be honest. I'm pleased because I don't have to throw away one of my favourite pairs of shoes and because it feels like I have a new pair.


I am considering painting the heels black as well to make them feel a bit classier but I think I'll give them a couple of wears first. I didn't paint the heels black originally because I thought I might run out of paint after one shoes and then wouldn't I look a Muppet! Although two shoes in different colours might be kinda quirky.


And they are still as comfortable as ever! 


Yerp still definitely thinking about painting those heels to make the toes more of a statement!