Showing posts with label refashion. Show all posts

Friday, 6 October 2017

Refashioned Skirt From A Handmade Dress

There is nothing I hate more than when I spend time making something only for it to languish in the back of my wardrobe. It's bound to happen its not like you can try it on before you've made it is it? And we've all stood in a shop before trying to work out why the dress that seemed so perfect in theory actually looks like a potato sack.

Anyway I loved this dress when I first finished it but I just never wore it. The back is cut in a low v and due to a fit issue the straps fell down quite a lot exposing the old bosom, plus you have to go braless which is never a day to day wear pleaser. 


Anyway I did LOVE the fabric which I think is a Singapore printed cotton so I decided to try and fix it and make something more wearable. 


First of all I ripped out the zip then I just cut off the skirt part and threw the bodice away. This meant I got to keep the pockets!!! Although I had completely forgotten that this dress had pockets so ya know!


Next I cut a new waistband from some stash fabric and put it on with a zip and a hook and eye at the top.


And bish bash bosh done! I actually think I like it a lot more now and it should be easier to wear it day to day.


PLUS POCKETS! 

In other news!

- I'm freezing, seriously when did it get so cold? I'm absolutely dreading this winter I'm finding it hard to get out of bed as it is.

- I've just finished Gone Girl and boy what a book!!!! I literally couldn't put it down!

- I'm currently watching 'Allied' with Brad Pitt and I have high hopes that he'll take all his clothes off......... Filth Absolute filth

- I'm feeling a bit perkier this week, the hills aren't alive with the sound of music just yet but I think I'm heading to a good place emotionally. I've even had motivation to do stuff!

Much Love

Frankie 

x

Saturday, 24 June 2017

Gingham Circle Skirt

I feel like to be a proper British person I need to start this post off by mentioning the weather.... I mean haven't we just had it all?! The blazing sun followed by pouring rain! High humidity and then this morning it was actually chilly!

Anyways I made this skirt a lil while ago but I've gotten out of the habit of posting regularly, what can I say after a day of trying not to melt I'm pretty beat!


The fabric came from my Aunty Shelia and Uncle Gordons house, my mum and some other family members went to clear it out recently and they were kind enough to set aside a lot of their vintage linens for me. This was a table cloth, my mum said they must have found at least 15 whilst clearing out so as you can imagine they were all in pretty good condition, This had one small stain that came out during pre washing. The fabric appears to be some sort of cotton/linen type stuff?


Its a pretty cool gingham design and their was just enough to make a simple circle skirt. For  the waistband I used fabric from my stash and I decided to have a button front rather than a zip in the back. Mainly because I'm running out of skirt zips and couldn't be bother to go out. 


I reinforced the front placket with hemming tape, this just meant I had something a bit more stable to put the buttons onto! The waistband however was too thick to put a buttonhole into so that closes with a press stud instead. 


I am wondering if its bit short? Like I feel like I'm young enough to still be wearing short skirts but I;m also a mum so I bend down a lot???? 

But yeah all in all I love it! It does make me a bit sad to look at it though because it came from their house and its one of their things? I did feel a bit bad about cutting up one of her table cloths especially considering what good care she took of her things but I actually think she would have been quite tickled at the thought of me making a skirt from it.

In other news! 

This week ended up completely jacked up! We had a lovely visit from Rikkis Nan and Grandad on the Tuesday and then on the Wednesday lo and behold Rikki wakes up feeling rotten [we suspect tonsillitis] which put paid to our weekend plans! The idea was providing we had nice weather we would go camping and if we didn't I'd take the train to the new Abakhan store that was opening and have a day to myself and hopefully spend enough money to snag myself a goody bag! oh and try and get myself a signed copy of Jenny Taylors new book!! As it goes Rikki being ill meant we couldn't do either!!! Not a happy bunny! Actually that's an understatement, the combination of missing out on fun things, a ill husband and a miserable child left me in what I can only describe as a foul mood. I did apologise after all its not Rikkis fault he's ill [it is his fault hes a baby about it....].  

And the freezer broke! Rikki left it open one night and then It didn't work properly for 4 days so now we've had to throw away a metric tonne of food and restock! All whilst crossing our fingers that it doesn't break again! 

BUT all is currently well, I've just had a bath and a KFC and now I'm watching Clint Eastwood in escape from Alcatraz so all is well!

Much Love

Frankie

xxx


Wednesday, 6 July 2016

Dress to Wrap Skirt Refashion

I'm not even sure if this counts as an actual make, its barely a refashion!


This skirt started off life as a 1950's style dress that I got from Ethel Austin back in the day! Well actually my mum brought it and she brought one for herself for when we went to Goodwood. Yeah we used to rock the whole mother daughter matching thing, there were even headbands.

But on a side note, Ethel Austin how class was that shop!


Anyway the fit of the dress was pretty hit and miss to be honest so it ended up in the refashion pile. The fabric is a very light cotton and the dress had a circle skirt. Well I'm guessing its a circle skirt but to be honest I doubt its a proper full circle! the garment industry to tend to cut corners! It also had a fabric belt in the same fabric.


Anyway I separated the skirt from the bodice and then put the zip in my zipper drawer! Never waste a zipper in this house!!!

And then I gathered the skirt onto the fabric belt. To work out how long to keep my skirt section I measured my waist and did that measurement+half of that measurement [for example! - 28+14=42] naturally the belt was longer so that's how you get the tie.

I also added a button hole to make the ties fit easier but I judged that when I tried it on so I don't have a measurement for that.  


I love it it kind of reminds me of the Clemence skirt by Tilly and the Buttons, but with one added bonus.  


As it ties at the back [or the front or the side whatever floats your boat] then you have a nifty little secret! 


If you got out the dinner and say order a cheeky starter, and then eat all of your main because its just so darn good! And then well its not really a proper meal with out pudding is it? And then your feeling all bloated and like you might be sick, but it was worth it because everything tasted good! And you skirts cutting into you and your wishing everyone else would just finish up so you can go home and pop on your onesie? Well usually you'd have to sit there feeling uncomfortable and trying to wind up the conversation but with a wrap skirt you can just pop yourself off to the toilet and well loosen yourself off!!!

Its like magic honestly, nearly as good as your onesie! [I mean not quote as good as your onesie but close enough] 

Outfit Stats:
Choker - Handmade
Top - new look [was my sisters so about 15 years old?]
Skirt - Handmade
Shoes - mother in laws [snaffled]

Much Love

Frankie

xxx

Sunday, 17 April 2016

Two Shirts into One Shirt dress Refashion

I LOVE refashioning shirts! There are so many refashioning possibilities from one garment.
 I do find it hard to find nice shirts for refashioning though, I'm not a huge fan of trawling through the rails of my local charity shops [think less quality shirts and more tracksuits with juicy on the behind]
So instead I have to look to either Rikki who wears the same size shirt as me or my Dad [He doesn't wear the same size as me............]

Luckily for me my Dad was getting rid of a few shirts...... because I made him. And even luckier two of the shirts were exactly the same. FYI shopping with my dad is absolute hell so he must have REALLY liked these if he ended up with two!!! 
  

They are good quality shirts that require cuff links, made from cotton and have DEHAVILLAND written in the label which means nothing to me!


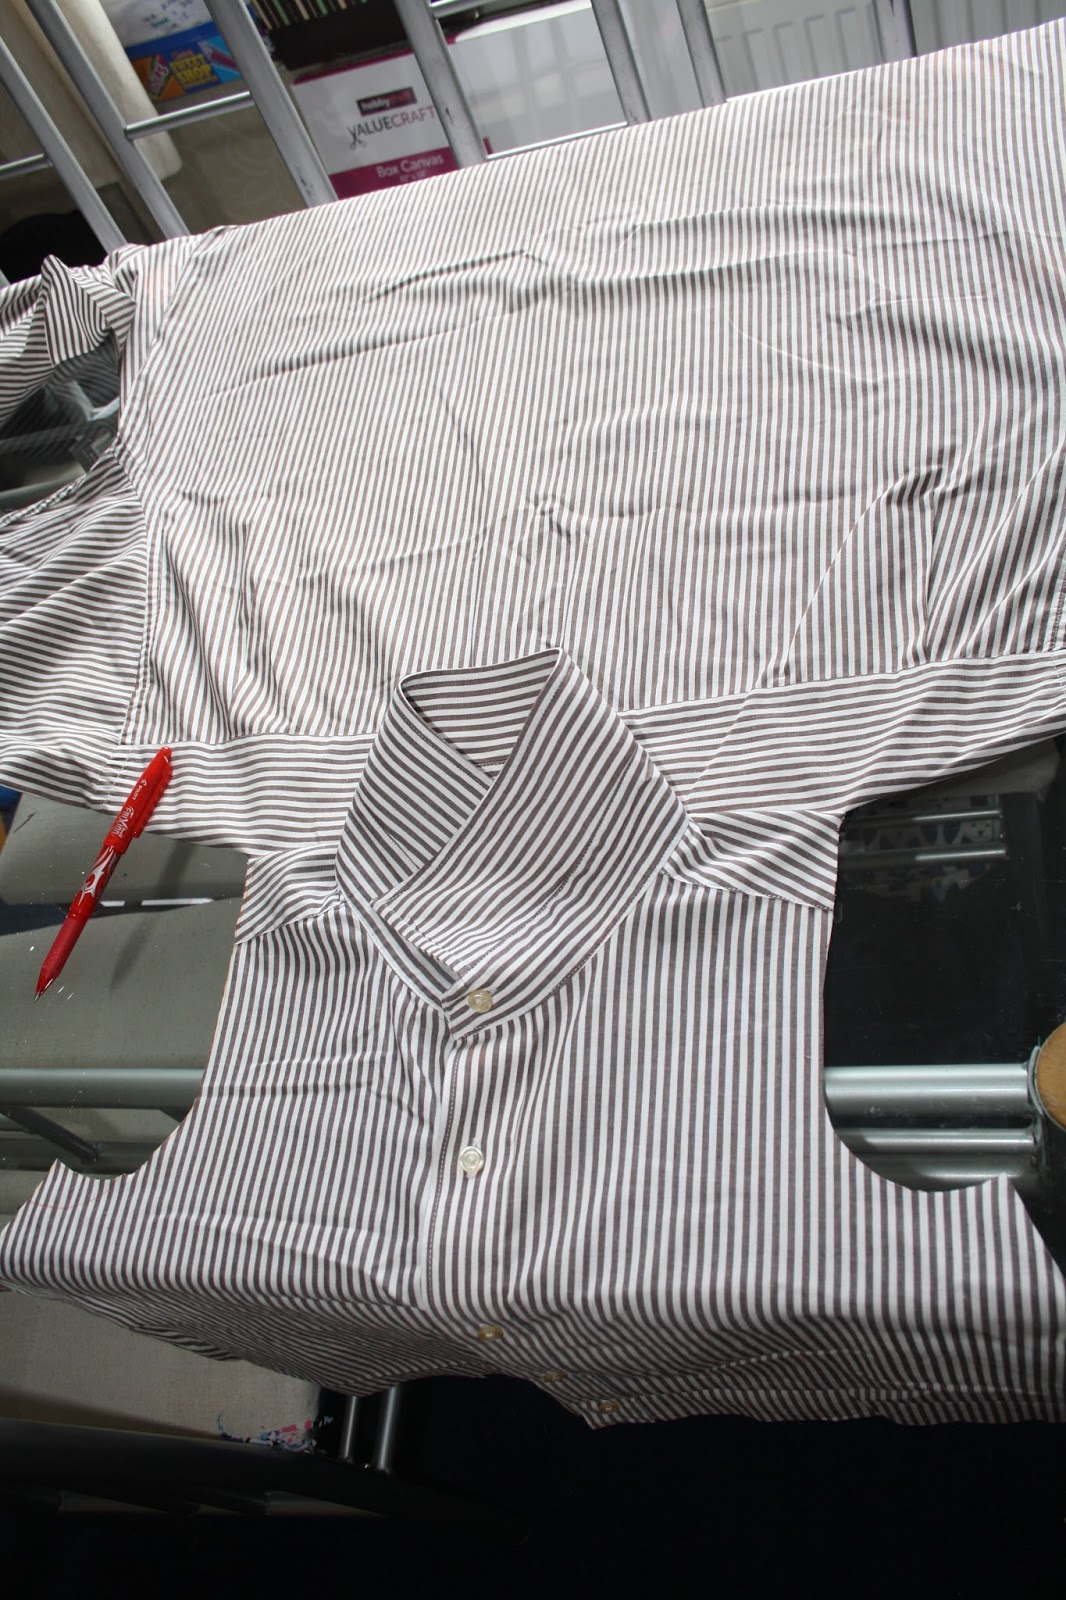
To start off I laid my shirt flat and got out my Lilou bodice pieces. Next I lay the pattern piece so the fold line went along the centre of the buttons on the button placket [I decided to use the button placket as my opening]. Then I transferred the pattern marking and flipped the pattern piece so I could do the same on the other side. If I were to do this again I would leave myself a bit more room for gaping, so I'd go from one side of the buttons instead!


Next I cut of the single layer of my shirt front and cut straight across the back yoke where to make a halter neck shape. 


Then I chucked it on my mannequin to check my theory worked. 


And then used what was left of the back to cut out my back bodice pieces [I omitted the seam allowance on the back centre seam and cut them on the fold.] 

The skirt was made by using the second shirt and simply cutting a straight line from the bottom of the arm to the bottom of the other arm. then simply I gathered this and added it to the bottom making sure to match up the button plackets and side seams.


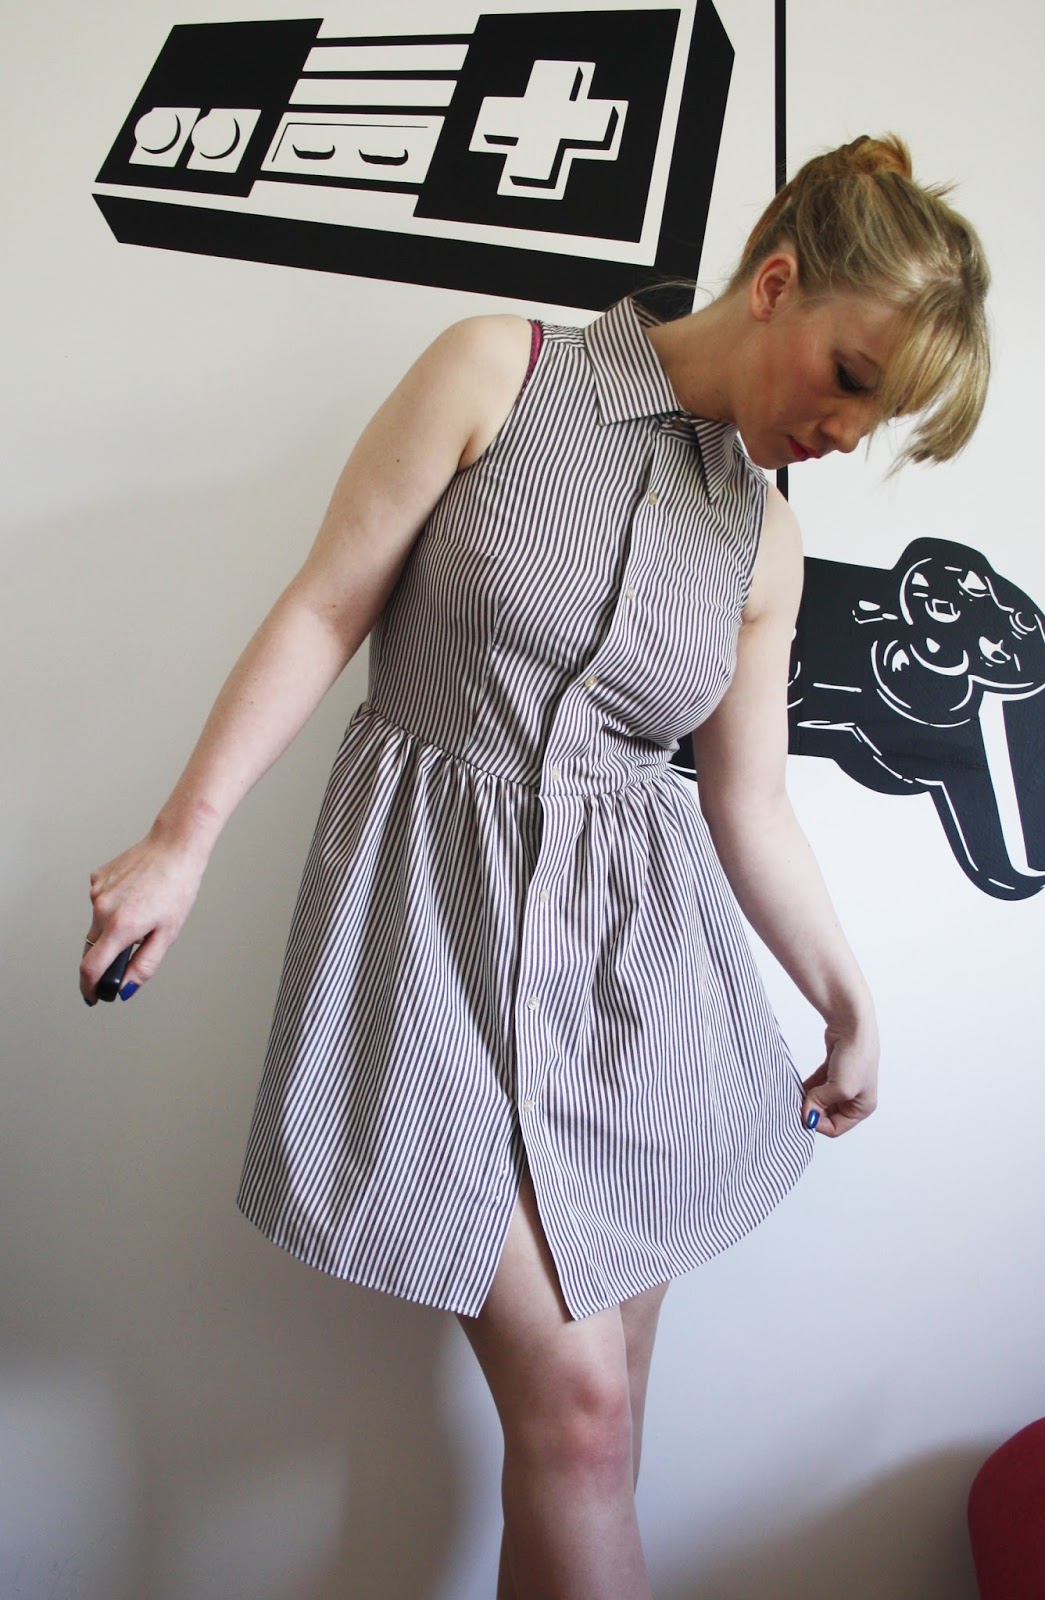
I used the arms of the shirt to make bias binding, which I used on the arm holes and the back. And I don't want to excite you too much but I didn't even have to hem it! Just used the original shirt hem! 


I've gotta say I really love how it looks! I could do with a bit more ease in the bodice but I am carrying a little bit of Easter width! Those pesky chocolate bunnies making me eat them.


I love the cut out back detail! It's so cute, I finished the edges of this with bias binding as well!


The pinstripes on this are making my eyes go west! It's kind of a white and darkish brown colour palette? Typical business man shirt sort of thing.


The bodice fits better open, in fact a slightly different bra might help? Jeez its hard being a lady so many things to think about!


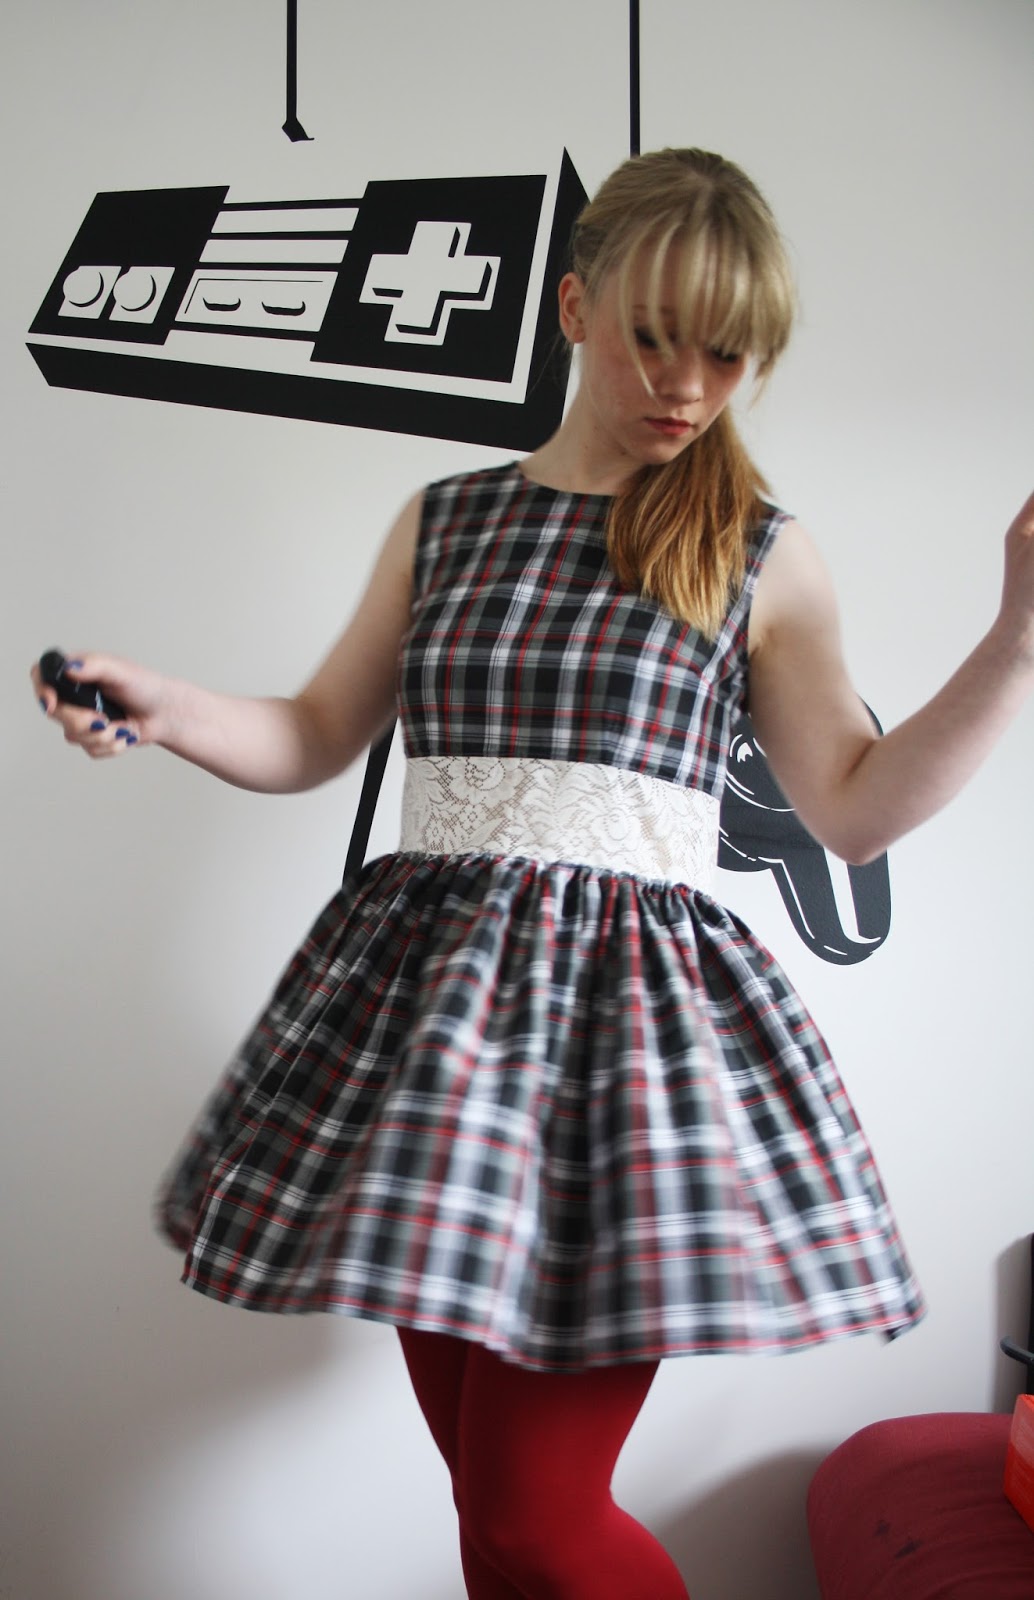
I think I'm going to be wearing it with this belt a lot for a lil bit of waist definition. The belt is also thrifted from a skirt! 


All in all I really love it, I've been wanting a shirt dress for ages and I love the relaxed style of this, it's pretty short but I think I can get away with it [please excuse my pasty skin I don't tan]

It was so lucky that I had two of these shirts to make this with although it might look cute with two shirts in different colours and doing some colour blocking. It could also help with adding some length! 

In other news, Lil man is back at nursery and I'm not pleased because he was fine over the two weeks! Not so much as a sniffle and then one day back and he's coughing and spluttering! Who are these germ infested children! And why aren't they keeping them away from the healthy ones!!!

Anyway I guess that's just what happens when you get large groups of toddlers together, and on the plus side if he passes it on to Rikki then they have to go on bed rest and I'll have lots of time to sew!

Now I just need to decided what to make next, this was pretty spur of the moment!

Much Love

Frankie

xxx


Friday, 15 April 2016

Refashion from Two Me Mades!

Sometimes when you make your own clothes you have misses, where you've brought the fabric and done everything right but it just doesn't work. which is what happened with these two items.


This skirt which I made here, and this megan dress that I made here 


So I hacked them up and spliced then together! I used the megan bodice with the sleeves and skirt removed.


Then I added in a lace waistband because I love the effect on this dress.


Then I used the skirt which was originally pleated gave it a good iron and made it gathered. And then popped it on the bottom! I didn't even have to re hem it!


Its not a great fit but its a lot more wearable than it was before, at least I hope it does seen as I only wore the skirt and dress a handful of times each.


I like that it has sort of a toddler style to it. makes me feel like a big kid again!


And I love the pretty flared skirt, gathers are so flattering!


When I first finished this I actually hated it again but after seeing these pictures I'm not sure its as bad as I thought!


And its got some great twirlability going on!  


I like it which red tights and my grey cardigan!


The arm holes are bias bound to hide the raw edges that where left when I took the sleeves off.


I top stitched the seam allowances away from the lace for a neater look.


and I added a button to the top because this zip tend to spring open if you stretch or move! Ooops just spotted all those hairy threads! must remember to trim those later!!!

All in all I'm calling this a success!  I just hope I wear it a lot more now!!!

Much Love 

Frankie 

xxx

Saturday, 9 April 2016

DIY Shoe Refashion

 Let me start off by saying I LOVE these shoes. I mean if I had to choose between saying Rikki from a burning building or these shoes, some days, just some days I would choose the shoes.

They are so comfortable its unreal, these shoes have never left me with blisters and a drunken Frankie once walked home from the pub wearing them. YES! wearing them, not carrying then in her hand, not balancing them on her feet whilst receiving a piggy back. Actually wearing them.


These cheap primark heels have seen many a night out, day trip and a very special wedding where I was taking all the pictures. YES! all the pictures and they coped through that too!


 Which is probably why they are wrecked, the heels or wrecked the toes are wrecked. But due to the fact they don't wreck my feet, I decided a quick spruce up was in order! And luckily for me the faux suede of these shoes was easy to refashion.


A good paint job can hide a multitude of sins! I'm using Revell model paint that was left over from some models Rikki built. I love that it comes in both matt and metallic colours! For this project I used silver and matt black.


And took my inspiration from shoes with contrast metallic toes, I think Kurt Geiger and Chanel made some.


First of all I taped off the toes and painted the main body of the shoe black. I had to do two coats for even coverage.


Then with a steady hand I pulled off the toe tape and painted the toes and heels metallic silver. Again I had to do two coats for even coverage.


Next I painted the soles red, al la Jimmy Choo. To be honest might do this with all my shoes because it makes me feel 100% more classy!


I think they turned out pretty BOSS to be honest. I'm pleased because I don't have to throw away one of my favourite pairs of shoes and because it feels like I have a new pair.


I am considering painting the heels black as well to make them feel a bit classier but I think I'll give them a couple of wears first. I didn't paint the heels black originally because I thought I might run out of paint after one shoes and then wouldn't I look a Muppet! Although two shoes in different colours might be kinda quirky.


And they are still as comfortable as ever! 


Yerp still definitely thinking about painting those heels to make the toes more of a statement!