Showing posts with label craft. Show all posts

Wednesday, 4 May 2016

First Attempts at Jewellery Making

Recently I was lucky enough to bag myself a free bracelet kit from jewellerymaker.com because I had a code in my quilting magazine. After some initial trouble with getting the website to order [probably because of the influx of visitors] But after some persistence I managed to get it to work and within about two to three days I had this little belter waiting on my doorstep.


My kit came with a "Get Started" Dvd , Gemstones and Elastic in a little organza bag. I thought the little bag was a nice touch and makes it feel like a little gift for yourself [The DVD suggests that you can use the bag as a gift bag should you want to pass on your finished item to someone else]


Now I'll be honest , with JewelleryMaker being a shopping channel I thought it was all going to be a naff. I immediate assumption was that the "gemstones" would be cheap or even plastic! BUT much to my delight they are gemstones, they feel weighty and cold just like stones should!  


They come threaded on a plastic string which I'm guessing is so they don't all roll around and get lost. I was a bit gutted that the gems were yellow, as the picture in the magazine had been pink and purple. But it did say that colours may vary so its not too bad. Actually I received yellow and I have blonde hair and my sister got orange and her hair is red so now I'm pretty sure jewellerymaker are stalking us.

The DVD is pretty short and isn't just specific to this bracelet instead it covers making basic, bracelets, necklaces and earrings. As well as talking through some of the tools you need to make jewellery [luckily you don't need any of them for this bracelet]


And here's my first attempt, the kit came with enough beads and elastic for two bracelets. Its pretty simple really thread the beads on and tie a knot! Although saying that I had some real trouble with the knot! Seriously that little swine kept pinging open and their wasn't really much detail on the video other than "tie a knot". Luckily before I lost my mind I remembered that the DVD had already said that their were more free tutorials on their website and I found this which helped greatly. Turns out a bit of glue solved the problem in seconds!


For my second bracelet I wanted to do something different [and delve into my own little stash of beads, yes I don't make jewellery but I still have a bead stash] These beads came from Rome? possibly on another bracelet and kind of look like glass. whilst I'm not sure it quite works it was nice to try something different, and I guess knowing what looks good is something that comes with time,


Here they are together looking all cute and stuff.


This is me modelling them, which is harder than it looks.


They are both pretty tight but that's my fault not theirs and I guess measuring elastic is another skill that comes with time.


They look pretty cute layered together!


So what do I think? Have I caught the jewellery making bug?

Well lets put it this way, I spent the morning googling jewellery making kits. I think I liked that's its almost instant gratification with jewellery making rather than the long time it takes to sew something or the even longer time it takes to knit something.

So yes I think that time willing it might be something I carry on with! I'm already lusting after this , this and this. And I think they might be producing their own magazine soon which I'm sure will have me making doe eyes at Rikki!

Anyway I'm calling this a grand success! And possibly another craft found! And If you want to order from http://www.jewellerymaker.com/en-gb/ You can use this code-   CDBM86  For a cheeky £10.00 off! [not sure if there's a minimum spend!]

Much Love

Frankie

p.s Whilst I did receive this kit for free because of the code in my magazine it is not a sponsored post! Jewellerymaker.com have not asked me to do this, I just really liked the product and thought I'd share my thoughts! and code!


Friday, 8 January 2016

A wreath for all seasons

Okay so I know Christmas is over but every year I put a few projects on my to do list and sometimes I don't get around to them till after Christmas! 

Luckily for me the way I chose to do this project means it's not too seasonal. 


I started with an old wire hanger, one of the last ones in our house due to the great wire cull of 2013 I hate these bloody things. I didnt know coat hangers could make me curse until I tried to hang anything at all on one of these! 

So anyway I basically manipulated it into a round shape using my hands, no cutting required. (Sorry about the state of my carpet, the only way cleaning comes before crafting in this house is in the dictionary) 

Then I just tied lots of white stripes to the circle using a simple knot. 


And voila , wreath! I experimented with textures by emptying my scrap bin, there's cotton, netting, lace, and various other textures. There's also some wrapping ribbon (you know the plastic stuff) 

I cut each strip about 1cm wide and just under 10cm long? But I didn't measure I just eyeballed it. Then tied the different textures on in a random order! 


All in all I like it, it was a nice quick project that prompted a decent result. 


And it cleared out my scrap bin which is always a plus, especially with the way my scrap bin is! 


To fix it to the door I used some ribbon attached to the other side, but I've heard you can get special door hooks. The beauty of the project means that because you don't cut up the hanger you still have the hook part of the hanger for hanging it up. 


I'm not sure what I'll do with it now. I'm too heavy handed with doors to have it at  my house so my mum might end up with it. 

And because it's not entirely Christmas themed she might be able to use it all year round! Apparently that's a thing now? A wreath for every season? 

Do you use wreaths all year round? 

Much love

Frankie

Xxx

Monday, 27 July 2015

Casual quilting

I was struck down by stomach cramps last night. So after a hot water bottle , a couple of paracetomal and a tot of brandy, I settled on the sofa with some trashy telly and some hand quilting.


I've had this panel for a long long time! I have no idea why I brought it? Probably the magpie in me going oooooh pretty! 


You can't really see the quilting , but it's pretty basic stitching , and it's turning out nice and poofy! 


I've done the usual three layers that I do , cotton , wadding, cotton! 

My only bug bare is that it's a touch too small for my embroidery hoop so it's being done without! And I'm constantly worrying about it rucking up! 


Here's the very attractive back! Not much more to say really apart from I think I know what I'm going to do with it when the hand quilting a finished and my tummy stops hurting! 

Much love

Frankie

Xxx

Saturday, 25 July 2015

There's only so many pieces of fruit a person can sew.....

I have two magazines delivered a month, Disney sweets and treats and love quilting and patchwork! Which my sister and brother in law kindly got me as a present! 


I stopped buying seeing magazines a while ago, it seemed to be a lot of the same old same old , lots of kitsch things to fill a house, and lots of upcycling projects I would never do! Plus every issue seemed to feature how to make a pin cushion, and nobody needs that many pin cushions! 

However I am seriously enjoying love quilting and patchwork, maybe it's because it's focused on one skill, or that it features a great mixture of projects for different skill levels! 

But it also has excellent free items, like things you'll actually use, not just things to clog up the place! 

In fact I enjoy it that much I re read it pretty much everyday, there's nothing I like more than my morning brew and a quick retread whilst lil knitwit eats his breakfast. 

But a few days ago I got another magazine surprise! Mr knitwit brought me a copy of let's knit on the way back from the barbers! 


He doesn't really get the craft thing so it always surprises me when he does something like this! Anyway I was pleasantly surprised by the projects in this as well! In fact there a couple of things I'm going to try and make and one project that might encourage me to ask Mr knitwits nan how to use double pointed needles! 

And as an added bonus it came with a kit to make this. 


Which little knitwit has his eye on! It's patiently waiting in the knitting queue. I've got an order for a minion to do and then part three of my little lamb review and then I'm going to make this bad boy! 

Much love

Frankie

Xxx

Sunday, 21 June 2015

Gone fishing.

I'm When I asked little knitwits what he wanted to do this morning he replied fishing. 

I don't fish

I can't ever remember fishing , (I do however remember my brother chasing me with a box of maggots when he went fishing)

So I decided my best bet was to make him his own little fishing set. 


Here's what I started with:
Bamboo cane (short)
Thread 
Felt
Wool
Stuffing
Scissors
Paper clips
Buttons

First I cut a fish shape


Then I blanket stitched around it, and little knitwits added some stuffing. 


Next I used a paper clip to create a loop so the fish could be hooked, I secured this using an over and over stitch. 


And then quite simply I added some button eyes, little knitwits picked which buttons we used! 


And voila one fish ready to be hooked! 


Now the rod was a bit more complicated:


I used the same technique that is used when you whip the ends of rope to stop them fraying (I learnt how to do this as a Royal Navy cadet) 

First you create a loop, and starting at the bottom wind the wool up making sure you don't leave any gaps. 


Keep winding! 


All the way up to the top then cut the wool leaving about 10inches of wool (your loop should still be visible. 


Thread your tail through the loop and pull the extra piece of string at the bottom, the loop will close leaving you with a tidy finish! That completes your handle! 

For the hooked end do exactly the same but this time cut a much longer tail and a paper clip hook! 


Then attach this to your long tail. 


I used an over under, type weaving stick to make it nice and neat. 


I also added a bead for weight! 

And your finished! 


And the beauty of this project is that there's so many ways to make it, you can sew, use paper, knitted fish. You can use magnets for littler children and turn it into an environmental game for older children by added things that pollute the ocean and getting them to hook them out! 

Either way I hope little knitwits likes it! 

Much love

Frankie

Xxx

Wednesday, 25 February 2015

A lil piece of home

When lil Knitwit started nursery they asked us to provide a home link box. Basically this would be a small box filled with things from home that would help to settle him if he was feeling sad or missing us. 
Needless to say as a mother who was allowing someone else to care for her child after two years of being a stay at home mum. I threw my heart and soul into decorating that box. My baby boy would have the best box on the shelf! 


I stencilled his name. 


Hand drew thomas (his favourite)


And placed baby bunny and a few other things in! After I lined the box with shiny paper and thomas decals.

I went all out, and to be honest doing it made me feel a little bit better about the whole situation, it was nice to know he always had a little peice of home and that mummy's crafting skills had been useful! 

Ironically he never used the box, didn't touch it, wasn't interested. 

Much love

Frankie

Xxx


Wednesday, 26 November 2014

New janome sewing machine!

Okay so remember I said I'd gotten a new machine? Well remember I said it needed a little tune up? Well it was having a little bit of difficulty sewing, it was stiching the back quite loosely so I had to have a tinker! 


First I cleaned out the bobbin area thingy!
Including unscrewing the plate! 


Next I cleaned the up downy bit! (Technical term) and changed the needle! 

This still didn't work! So fiddled with the tension for a bit, no luck still loose stitches! And then I decided to try the zig zag to see how that worked! Now by some fluke although I changed the stitch length and width, I forgot to change the actual stitch! (Bear with me I'm getting to the point) 

Anyway it produced a lovely line (not zig zag) of stitching! No puckers! No loose stitches! Now after a little bit of dective work it became apparent that the machine will only stitch nicely if the needle is off centre! 

No seriously ! Central = messy stitching, 2mm off center = perfect! 

And I have no idea why! I might try undoing the entire foot bit incase it's been put on wrong! But other than that I have no ideas? Anybody out there know what it could be? 

In other news I have downed my usual craft tools today in favour of this! 


Yes sometimes, on certain projects only a bread knife will do! 

Much love 

Frankie

Xxx

Saturday, 16 August 2014

I can hear the royal ballet calling

I remember quite clearly taking ballet when I was younger. Safe to say due to my lack of elegance and grace, and my inability to walk 5 steps without it sounding like a hoard of elephants, I was fairly rubbish. To the point where one day my Mother pointed out that my sister was better at ballet when she took it, and seen as I had always considered that my sister was the only person more ungraceful than me, I quit. 
I did love the outfits though, still do. Any opportunity to wear a tutu and I'm there. I even sailed the Menai straits in a tutu once with some school friends. 
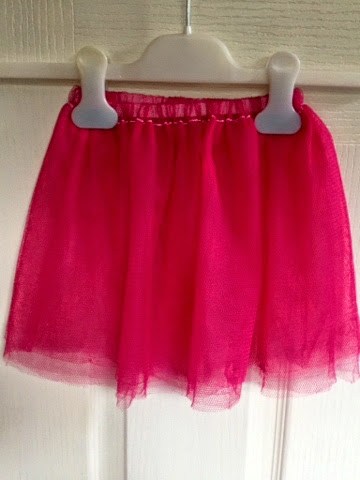
I also think that little girls in tutus are the cutest thing ever! Nothing makes me smile more than a baby in a tutu! Which is why last night (whilst watching Bridget jones) I made eight little girl tutus! 


This is only two of them.


I couldn't take more pictures because Little Knitwit asked me very nicely to come and play castles!

Which is where I'm blogging from! Yes a pop up castle! Little Knitwit was brought it by his god mother and I don't think either of us have been out if it yet! So I'm blogging from my new iPhone and using the blogger app! I'm hoping this will give me more freedom to blog when I have five minutes and I won't have to mess about getting laptop cables and procrastinating on Facebook/Pinterest/twitter! So what do you think? Can you tell the difference between laptop Frankie and phone Frankie? And how's the picture quality looking? I usually use my slr camera but I think I'll carry on using that for bigger projects and just use this for updates!

Must toodle , little Knitwit has decided that he doesn't want to read his book anymore and that a dragon is attacking the castle!

Wish me luck

Much love

Frankie

Xxx