Showing posts with label Fabric. Show all posts

Wednesday, 29 August 2018

The happy little hippy dress

Let's just pretend were back in June, England's still got a chance in the world cup , love islands on and we are still having a glorious heatwave...
Working?
Nah? 
In which case let me introduce you to the dress I probably won't wear until next summer. 


Yep I made this during one of those good god its hot sort of days when everything in my wardrobe felt too warm or too constricting. 

The main idea of the dress was based around this panel print I got from the first fill a bag sale my local abakhans had. Originally I wanted to make a kimono dress but the pattern consisted of two large squares and some twiddy pattern bits and I just couldn't figure out the placement so I gave up and chucked the fabric in a pile. 

Naturally I didn't take a picture of the actual fabric because I'm a TERRIBLE blogger.


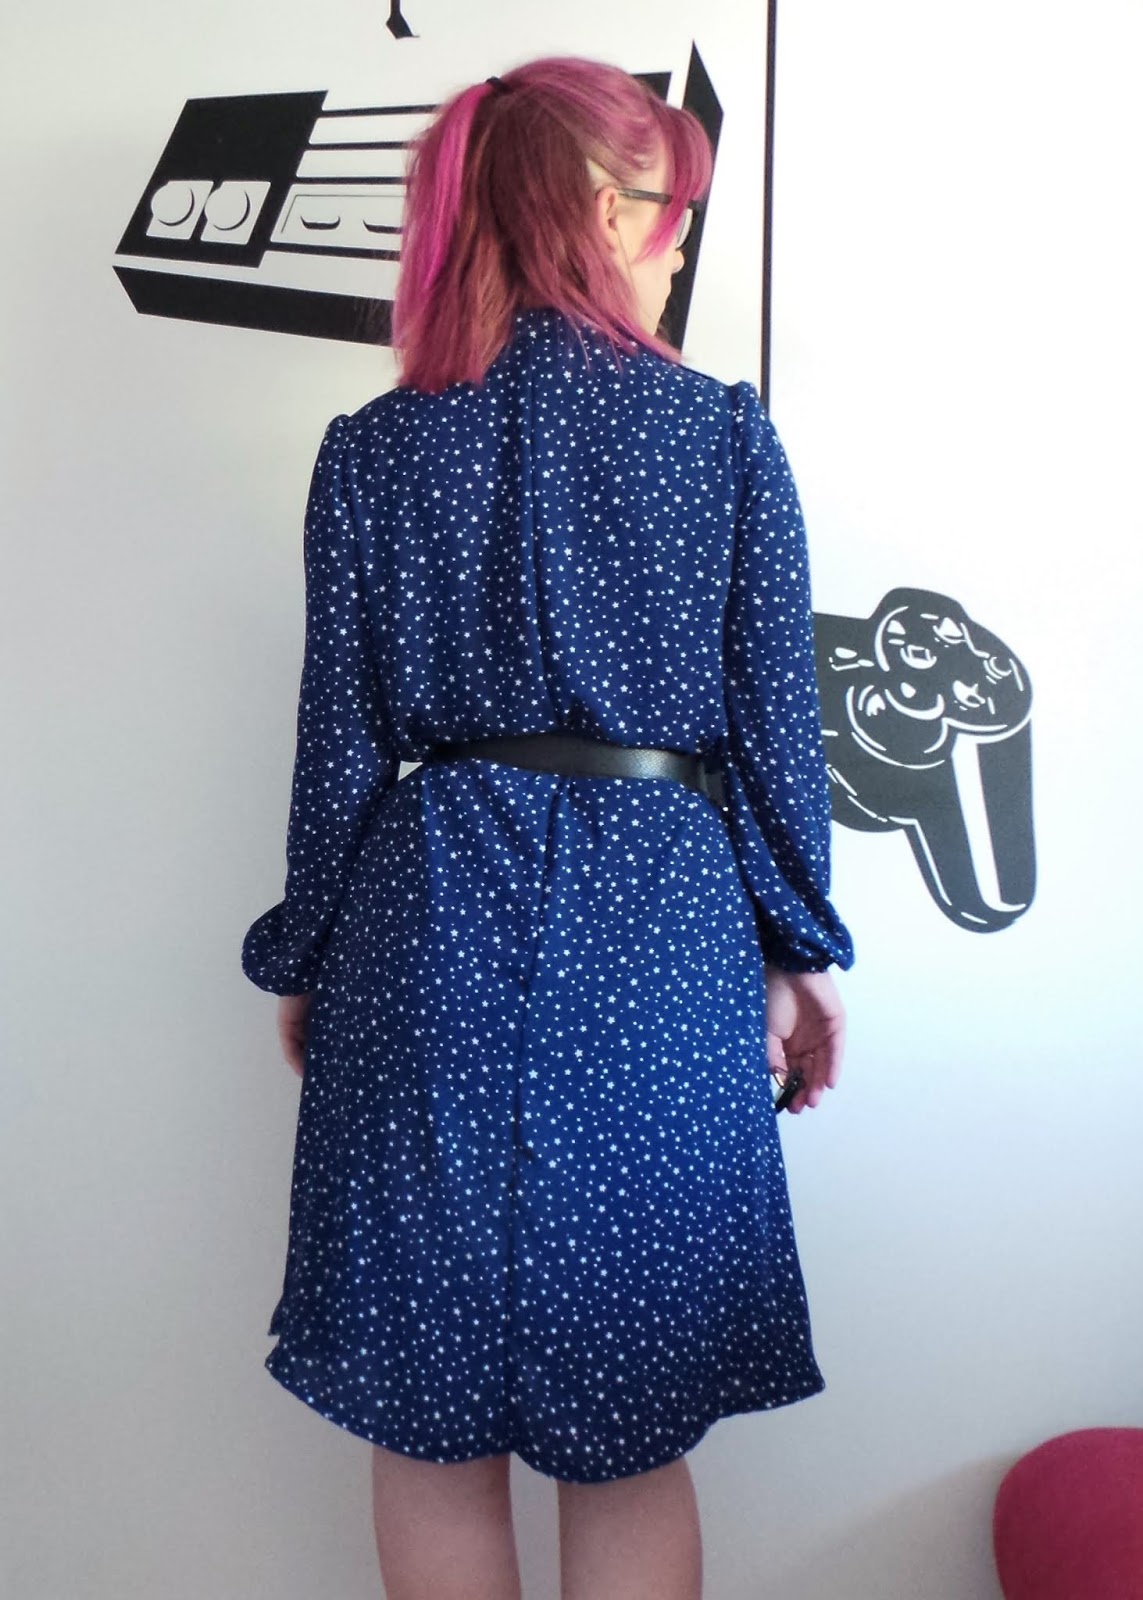
As it goes the print worked nicely for this dress , I used the two square pieces for the front and back of my skirt. I didn't even cut them on the fold I literally just cut around the square. And then used the extra twiddly bits on the straps , facings and bodice. 

The bodice itself is the Cami top from the gbsb (3rd) book. I cropped mine to hit my belly button and took some ease out of the back because of gaping. (I also used this pattern here and its one of my favourite party dresses)  and then added a simple gathered skirt.


The print isn't identical on the front and back of the bodice but I was working with fabric restrictions so it ended up being a bit of a hey ho moment. 


One issue I am having is that the skirt feels really long. I am trying to get on bored with longer skirts because in reality they are so much more practical. But every time I make something I'm still tempted the reach for the scissors and make it mid thigh length .

However I can't with this one because it will ruin the printed panel on the skirt.


And there are two more issues . 
1, the back is still gaping , I'm working on fixing this but I'm conscious that if I go too fitted I might no be able to pull it on over my head and one of the beauties of this dress is that theirs no fastenings (yes it makes it a really quick and satisfying sew)
2, its a about half a degree of being maternity wear. I could belt it but that sort of defeats the object of it being a really loose dress for hot days. On the plus side I can confirm that you can fit a large pizza under this dress and no one  will know. (Not a physical large pizza , you can eat one and no one will notice. I haven't tested if you can hide actual pizza down it )


Naturally I love it because it makes me feel like a happy little hippy who wants to dance around bare foot and preach love and peace. In fact as soon as I'd made it I played Fleetwood Mac and pretended to be Stevie Nick's for a bit. Not ashamed at all. 


All in all I think its really successful even if I won't get to wear it much now the winter nights are drawing in. 

In other news! 

I've still not been sewing, boooooooo. But I'm planning to crack right on when lil man goes back to school. I know traditionally I give the house a good clean on the first day. But screw that this time I'm sewing. 

I've added a few more hexagons to my EPP , its not growing very quickly but I enjoy the process. 

I had a day at the dog track!!!! And guess who won 3 times? ME! And guess who won 4? LIL MAN! And guess who didn't win at all??????? Rikki! much to my amusement and his disgust.

And I think that's all!

Much love

 Frankie 

Saturday, 7 July 2018

A Kimono for Chelsey

It was our next door neighbour Chelsey's birthday last week . 

Luckily for me we wanted a kimono cardigan for her holiday and also luckily for me she didn't find one when she went shopping.


I used the simple sew kimono wrap dress pattern to make it. I've made this once before and I love my version. And I figured seen as me and Chels are about the same size then I could use the same cut pattern pieces as I normally use. (I've seen her in it and yay it fits!!!!!)


Construction wise its really really simple just the shoulder and side seams both of which I sewed on my over locker. 

Then I sewed round all the edges with my overlocker so I'd have something firm to turn over for the hems. I always tend to do this with fine fabrics because it gives a really neat finish and a really small hem.

The whole thing probably didn't take more than an hour to sew. In fact the cutting out probably took the most time because the fabric was so darn shifty. I didn't trust my dining room table not to make the fabric stretch and hang funny so I moved the coffee table and the rug and cut it out on the living room floor. 


I added one of my labels to the back because,e I thought it might be a nice touch. As it goes it actually tricked overtone into thinking it was from a real shop!!! 

Which I'm taking as a win because I guess it means my sewing looks super professional! Lol! 

Anyways it went down really well and I think she liked it! 

In other news : 

Polly is still settling in, so far she likes me and Marcus. She likes Rikki most of the time unless he makes any sudden movements or raises his arms above his head (which leads me to believe that a man used to hurt her, she also won't walk near men and cowers away from them which backs my theory up)

It's bloody hot! I've been enjoying to chance to wear my summer dresses gut the rest of the time I've just been lazing around trying not to sweat.

I went to the abakhans fill a bag sale this morning!!! It was awesome and I got lots of fabric (I'll do a separate post on those). It was a bit stressful though, Rikki was on nights so I was terrified that Polly was going to bark and wake him up!!! And I had to take Marcus with me which meant I was worried about loosing him. Luckily my mum dad and sister came with me so they did a lot of the Marcus watching whilst I did a lot of the burrowing for fabric. 

And he did some choosing of fabrics of his own!! Fabrics for me of. Purse but I let him pick s few things and he actually said he had fun so that's a win!

Much love

Frankie 

Xxxx

Monday, 25 June 2018

Polly's New Blanket - Learning to Sew Patchwork Curves

Life's pretty good at the moment.
I'm pretty much on top of the housework, I'm hitting 10,000 steps a day and I have a new dog. 


Anyway I've decided that this year would be all about learning new skills and learning to piece curves for patchwork. I've had a subscription to love patchwork and quilting magazine for a few years now (thanks by the way Netty and Keith) 


Luckily the magazine come with free templates etc so I used those to draw straight onto the fabric. It saved a lot of time and meant I didn't have to spend a hour on the Internet trying to find a decent template. 

Piecing them together was more tricky than I expected. Obviously I piece a lot of curves for dressmaking but this was a whole new kettle of fish. I used about four pins per quarter circle and swore a lot. 


Fabrics wise everything was from my stash , there's a right mixture if bits and pieces in their including some of my favourite fabrics . Living with boys I tend to use a lot of dark colours so I really enjoyed making this pink explosion for Polly. 

Quilting wise I kept it simple and just did some straight lines , I was going to do free motion quilting but I couldn't get the bloody tension to work properly and after I'd unpicked some of it once I wasn't going to risk doing the whole thing just to have to undo it if I hated it.

Luckily because its a teeny weeny quilt it didn't take very long to quilt at all. In fact I did all the quilting in the adverts of love island. 


Naturally I couldn't get a nice picture of Polly sat on the blanket , I tried bribing her with treats but it didn't really help. To be honest most of the pictures were of her bum and then of course their was the one of her pooping........ 

So yeah this is the best I could do. Polly spends a lot of time in her basket as its her "safe place" and normally she doesn't look as happy as this but see just been for a walk so she was living her best life. 

That or she was thirsty? We are still having trouble getting her to realise that the water and food bowl is just for her. 

I finally have access to a tablet! My tablet went squiffy last week but luckily my kind neighbour Chelsey had a tablet she didn't use so I'm using that. So far I love it its HUGE so I can actually use the screen to type rather than having to plug in my keyboard! So cheers Chelsey love you!!! 

In other news! 

Lil man has his voice back!! 

Much love 

Frankie 

Xxx


Monday, 21 May 2018

70's Style Dress in Adam Ross Fabric

Do you ever just pick a fabric because you think its pretty but not actually have any idea what to do with it?

That's what I did when Adam Ross asked me what my blogger pick fabric would be. I was like "oooooh stars! pretty". It instantly took me back to being younger when star prints were MASSIVELY in fashion and searching through the topshop rails trying to find something that might fit and cover at least three inches of my bum. [FYI I never found anything in top shop as a teenager ever! It was always too small! Do they even stock clothes over a size ten?]


Anyway naturally because I had no idea what I wanted to do with the fabric I left it to the kind people of instagram to decide. The first two patterns are vintage and the last one is a Gertie pattern that came free with an issue of love sewing. 

And instagram chose..........

Pattern number two! Which apart from being a "style" pattern I have no other information about because LOL that's literally the only part of the pattern envelop that's fallen off! [BTW I would highly recommend using Instagram as a way of deciding what patterns etc to use.]


I think the dress turned out super cute [Ignore my miserable face on the pictures I'm having trouble with the shutter remote on my digital camera]

The fabric is very floaty and frays a little bit so I decided to over lock all of my seams before I started to sew. Its a complete faff but its worth it to make sure that your dress lasts and it makes the insides look really neat. 


The actual construction was done on my regular machine though. Sadly you can't see a lot of the details because of how busy the print is. For example you can't see the pin tucks on the front bodice and you can't really see the collar! I do recommend using sharp pins on a fabric like this though because you don't want it to pull. 


What you can see however is those FABULOUS sleeves!!!! I had forgotten how much I love a 70's style sleeve! I have no idea what kind of sleeve it is? Bishop maybe? But I like it and I even manged to get just the right amount of tightness on the elastic in the cuffs. Normally If I have to add elastic to anything I make it so tight that my blood circulation gets cut off and my hand turns blue............


I'm not keen on the back seam so I might later the pattern to take that out. I just can't really work out why its there. It also needs another good press, I had to be really careful pressing the fabric because I was terrified of burning a hole right in the middle of the fabric. As it goes I managed to avoid all ironing related disasters but I was being really really careful! I used a pressing cloth and kept my iron on a really low setting.  


The collar is the only thing on the dress that's interfaced so the whole dress swishes really nicely. Its one of those dress that when you wear it you just parade yourself around the house swishing and swirling and just generally making a bit of a muppet of yourself, whilst feeling very proud. 

I'm wearing a slip underneath but I think if this was just a top I wouldn't need it. Really the only reason I have a slip on is just in case but really the fabric is quite opaque for such a delicate fabric. 


I didn't make any major changes to the pattern apart from taking quite a lot of the length and lowering the neckline slightly. Because I'm a bit more saucy than those 70's women [although if history teaches us anything its that the 70's were a pretty free and easy time!] 


As you can see from the picture above I do have to belt the dress because its a bit of a tent but I like the loose fit and I think it might be good for wearing as a cover up on the beach. 

I'm actually hoping that the weather might cool a bit soon just so I can get chance to wear it! I can't be doing with long sleeves in hot weather. 

Or is that a bit selfish of me?

Much Love

Frankie 

xxx

discalimer - whilst Adam Ross sent me this fabric all thought and views are my own.


Sunday, 13 May 2018

DIY Tailors Ham and Sleeve Roll


A while ago I posted a question on instagram asking whether I should make my own tailors ham or buy one. 

And the response was mixed to say the least. No literally the replies were split down the middle which makes me think a lot is personal preference. The pros of making one were that I could choose whatever fabric I liked [ie. make it personal] And that its cheaper than buying one and the pros of buying one was that I could save a lot of time! 


At the time funds were low so I decided to make my own. I didn't even spend anything! I used a free pattern from craftsy and we already keep sawdust in the house for the guinea pig so I didn't need to buy any of that to stuff it with. [You can also use fabric scraps if you don't like the sound of using sawdust although traditionally that is whats used and the wood does something magic with the heat of your iron meaning the seams press better. I'm sure theirs a science explanation but *magic* sounds better.]

I made both the tailors ham and sleeve roll at the same time and they only took about 30 mins to print off, tape together, cut out and sew. In fact the majority of the time spent on these was for stuffing the bloody things! 

WARNING to anyone who's thinking of making one using sawdust, Its blooming messy. We had sawdust across the house for ages and it sticks to everything. You see you have to really cram it in to make it nice and firm for ironing your seams. In the end I enlisted Rikkis help and things went like this:

-I'd sit and spend 30/40 minutes cramming sawdust in through the little gap I'd left.
- I'd say I think its done....
-Rikki would come over and cram all the stuffing down, compacting it and inevitability leaving me with a gap to fill with yet more stuffing! 

Lets just say it took at lot longer than I thought and I used a lot more saw dust than I thought, and I was glad I had Rikki on hand to "punch" it down so to speak.


Fabric wise I used a cotton fat quarter from Minerva crafts for the front and some spare boiled wool for the back. I sewed the seams using a small stitch on my machine and then over locked them for security. The gap I left for stuffing was sewn shut by hand [ if your making your own I suggest leaving a fairly large gap as it makes it easier to stuff. I started off with a little gap and ended up throwing a tantrum] 

 I think my favourite part of this make might be the fabric I used. It was nice to use up some of the left over boiled wool and I really liked using up a sewing themed fat quarter for a sewing themed project! I can't find the fabric I used on the website but I think it would also be cute made up in this. 


Now the funny thing is the morning I finished these I received a gift in the post from Prym and lo and behold it was their tailors ham and sleeve roll! Which is kind of hilarious but also gives me a good opportunity to compare the two so look out for a post soon that compares my handmade tailors ham with the real deal! 

In other news! 

- I'm tired, It sounds stupid but I haven't been sleeping well so if anyone has any ideas of how I can get a decent nights sleep I'd really appreciate it. But preferably with lavender as it brings Rikki out in a rash and as much as I'd like a good nights sleep him next to me whimpering that his skin hurts won't help! 

- Lil mans nose is much better. A cotton pad, a warm bath and a lot of patience helped to get all of the dried blood off his nose and he was really brave whilst I cleaned it up. Its still swollen and he says it still hurts a bit but its not bleeding as much and a lot of the bruising has gone so that's good. 

Much Love

Frankie 

xxx


Thursday, 15 March 2018

Unicorn Sweatshirt! Fabric by Adam Ross

Its no secret that I LOVE unicorns!! I have mugs and scarves and teddies [Fun Fact: When we first got together Rikki won me a Unicorn on hook a duck at the local fair and I still have it. ]


So when Adam Ross asked me if I'd in doing a fabric review on their website I was like YES! And then when I saw that they had unicorns I did a little happy dance because UNICORNS!!!!! 


The fabric itself is a sweatshirt type fabric in a medium weight. It comes in this charcoal grey with pale pink unicorns and white with pink unicorns. FYI the unicorns are glittery!! 

One thing I really like about the website is that underneath the pictures of the fabric it has a list of fabric properties, a list of sewing suggestions and then a list of suggestions of things to make. I've not seen that sort of level of detail on a fabric website before and I'd imagine it would be really useful to someone who doesn't have a lot of experience with sewing or who might want some ideas of what to make with a fabric they love. 


The fabric is £12.49 a metre which is what I sort of expect to pay for a quality sweatshirt material. But I do like that the fabric is sold by the metre very often now fabrics are sold by the half metre and I always end up getting confused and ordering too little. 


I used a prima pattern to make mine but it's very similar to the linden pattern by grainline studios. I added some piping to the shoulder seams to break up the print a bit but stupidly used a fabric that's a bit too thick so my over locker was struggling. I managed to get it through but knew I'd never be able to pipe the cuffs or collar so I skipped them. I did wonder if it might look a bit weird just having the shoulders piped but my mum said it looks okay. 

Construction wise apart from using my over locker I also used my sharpest pins and made sure to double check the pattern pieces were all lying the right way around before I cut it out. I definitely didn't want any upside down unicorns!!!! 


On the above picture you can sort of see the glitter on the unicorns, which is still there after all the washes its had [about 4/5]. 

I actually made the jumper when we had all the snow because I was starting to run out of warm clothes to wear! And now its my go to snuggle jumper. I just makes me smile so much every time I reach to put it on. The inside is very soft as well so its nice to sit and relax in. 

All in all I really love this jumper. I feel like I'm reaching a point where I'm filling gaps in my wardrobe and I was in need of a cosy jumper. I'm also impressed with how well the fabric has been holding up to the constant washing and wearing, which makes me think, maybe I need one in white as well?????

In other news apparently we are going to get more snow this weekend and you know what they say snow day means sew day! 

Much Love 

Frankie 

xxx

Disclaimer, Adam Ross sent me this fabric for free but all thoughts and views are my own x

Monday, 29 January 2018

Mccalls 7381 - Take Two

How are we all? Coping well with the frankly miserable weather we've been having recently? No? Me neither. 

This whole cold and rainy weather situation is making me miserable. I want to wear pretty dresses and dolly shoes and my denim jacket! I am so sick of being bundled up in 100 layers with my vest tucked into my knickers [if you don't tuck your vest into your pants, try it! Keeps your tummy lovely and snug!]

Anyway I was being a complete whinge bag about it last night. Mainly because I have the beginnings of a cold. But Rikki was kind enough to point out that in summer my hay fever starts up and I'll be back in the same snotty situation I am now....... But with cuter dresses and less tights.


Anyway this dress is one of those rare hybrids where the combination of the style and the fabric means it looks as nice with a denim jacket and no tights as it does with a big chunky cardigan, thick tights and boots.


The fabric is a poly satin and was given to me by the lovely Sara [insta : @saraknitsandsews]. Basically during one of the photo challenges she posted this fabric under the title "what was I thing?" and said if anybody wanted it she would be happy to have it taken off her hands. *waves hands furiously in the air* .

I love it! Its such a fun and quirky print and we all know how much I love the challenge of a boarder print! So thanks Sara your a babe and there is some seriously good karma coming your way!


Right so the pattern is Mccalls 7381, which I got from a magazine and I've already made here. This however is the size down from the first version I made and due to fabric shortages I omitted the sleeves. 


So this one is a size small and to be honest I'm still having some issues with the fit. It looks okay from the front but from the back and the side it still looks like their is far to much fabric. I think for my next version I'm going to try and put elastic around the whole waist to see if that helps and if not I guess I'm going to have to chalk this pattern up as an experience. 


This version only has elastic at the back. Which is a solid 10 on the comfort scale but I'd rather it looked good too. Mainly I've been wearing it with a cardigan though so you can;t see the extra fabric at the back.


Construction wise it went together really easily. The only really fiddly bits were the ties and the pleats and guttingly both of these details are lost in the busyness of the print. 

I didn't even adjust the hem so if you like a hem with more coverage then you may need to add some to the pattern. FYI I'm 5,6ish and it hits me just above the knee.


It took a good bit of pattern tetris to make sure that the colour gradient was the same the whole way around. The only compromise was that the back bodice lining had to be pieced. Instead of cutting on the fold I had to cut each bit separately and add a seam allowance and then stitch them together. You can't tell from the outside though and their are no raw edges on the inside. 


Looking at these pictures I probably could have left of the tie and saved myself some hassle. 


I added one of my sew in labels to the back. I'm still not quite over the novelty of having my name inside my clothes!


This is the pleat detail on the shoulder which takes loads of time but is basically lost in the print!


And the tie detail which also takes a lot of time and is again lost!


So aside from a few small fit issues I'm actually really pleased with this pattern. And the print is to die for! I love how bright and colourful it is! 

In other news! 

- I've traced a pattern from a dress book I got for Xmas and I can't wait to sew it up!

- My friend has given me a load of his records! Which is pretty cool because this girl loves records!

Much Love 

Frankie 

xxx

Wednesday, 17 January 2018

Pattern Hacked Tie Back Top

I love the old saying business in the front party in the back because well who doesn't love a party?

party in the back

This top was the original inspiration for my make. 
I found it on pinterest but you can view the whole article here!

I loved the style though and I thought it might be fun to recreate. 


Let me start by saying I HATE this top from the front I think its the most unflattering thing ever! [Sorry about the white on white pictures! But I have nowhere else to take them!]

But I started with a prima pattern for a basic long sleeved shell top and then  basically drafted in some ties and made the back into a deep v. As usual for me I completely forgot to take progress photos! 

Now I don't know what the front of their top looks like but If I were to make it again Id say I either need to add waist darts/shorten the length to waist, OR I need to make it in a jersey? OR maybe the neckline just needs to be lowered a bit? I dunno and to be honest as soon as I'd started to make it I was already sort of bored with the idea.


Its not super flattering from the side either. The top has bust darts but I'm wondering if I should have gone up a size? Waist darts are definitely needed look at all that excess fabric!!! 

Speaking of fabric I used a medium weight peach skin type thing and the main body of the top is lined. In hindsight I think that its a bit too stiff for this sort of top and that it needs something softer. The trouble is you need something soft enough to be flattering on the boob area [after all I am bra free and the tatas don't hang like they used to] but it needs a enough body to be able to make a cute bow. 


The back isn't awful compared to the rest of it. I think If I loose a few inches off the bottom it will sit better on my waist and just look nicer.

The bows a good length though theirs not too much hanging down so I'm happy with that part. 


I'm not sure its a pattern idea that I'll go straight back too but I can see myself tweaking with it in the future. Although I did promise myself I would only make practical clothes this year and their is nothing practical about an open back top that you can't wear a bra with. Unless your going for some sort of breast examination? In which case this would be the top to wear. 


Anyways all in all I'd say this is a fairly pants make. I love the idea but the fabric just didn't work and the pattern needs some major tweaking! 

In other news! 

- I'm currently ready 1984 by George Orwell. I've read it before but its been a few years and I;m already completely gripped by it! 

- I'm currently listening to Oasis on vinyl. After much hinting Rikki got me this for Xmas and I LOVE it! 

- I've not had more sewing on the go due to our tumble dryer pitching a fit meaning I can pre-wash fabric but I can't sew it up! Hopefully we get it sorted soon because the washing pile is becoming a problem. 

- I have however been trying to finish my cross stitch project. Hopefully I can put in a solid hour or so tonight and then it might actually be finished soon. 

Much Love 

Frankie

xxx


Monday, 15 January 2018

Abakhans fill a bag sale thoughts and my top tips for sale shopping!

I love a sale! Nothing is better in this world than something you want at half the price. Which is why I was so excited when I heard that the Abakhans fill a bag sale was coming to My local Hanley store. 

And I was even more excited when I realised I had quite the little pot of Christmas and Birthday money accumulated from my Mum and Dad.


Now I am planning on doing a video showing all of the fabrics I ended up with but I thought it might be nice to do a post saying what sort of happens and my top tips for going first. 

Okay so for starters! 

1. Get their earlyish. Now the staff do put things new things out throughout the day so everyone gets a fair shout BUT we did have to queue for about half an hour to actually get in. My mum picked me up at 9.00am so we should have been well early but we had a small not taking the exit we should have done issue on the way their. From what we could see they were operating a bit of a one in one out sort of thing which meant that the sale area wasn't getting over crowded. 

2. Be prepared to stand! This kind of links to the queueing thing but can you believe I nearly wore heeled boots? My feet would have died! 


3. Take a friend/family member. I went with my Mum because 1. she was paying and 2. its just nice to have some one with you isn't it. I especially liked that I had someone to chat to whilst waiting and that she was more than happy to look after the bags whilst I was digging for fabric. She did do some digging herself but I think the boxes being quite low down was making her back hurt, so in the end she was in charge of looking after the bags and trying to fit as much in as possible. 

Oh and the bags were £10 and you just put as much fabric in it as you could! 

4. Be open minded. You can't really go with a set plan of what exactly you want from a sale like with because all the fabric was in four huge cardboard boxes and you had to dig around. So you really have to look at things and immediately think do I like this? Does it fit in my wardrobe? What will I make with it? Their was a lot of lightweight floaty fabrics and a lot of heavyweight coat and sit fabrics but I didn't find many cottons. 

At the end of the day its a sale so you get what you get!  


5. Be polite. I always thought this was fairly standard when sale shopping but I went to the "NEXT" sale once and it was a bloodbath. But I'm happy to report that the abakhans sale was lovely, there was no pushing or shoving and on several occasions ladies actually helped me pull the fabric I wanted from the bottom of the box.

6. Check fabrics before you buy. Its a sale so naturally not every single piece of fabric is perfect. I saw a few pieces with holes in and a few with weave flaws so its worth taking a quick look to make sure there is nothing glaring in the fabric you've chosen. A few of the ones I picked had lil holes in but I'll be able to work around them no issue. 


7. Only buy what you'll use. At a sale its very tempting to get caught up in the moment and JUST BUY ALL THE FABRIC!!! but its better to be sensible! Yes get yourself a few wild cards [this girl picked up some swimwear fabric!!!] but also make sure you stick to the colours and fabrics that you actually like and will use! Remember its only a bargain if you'll use it! 

8. Park your car close. I ended up with four bags full of fabric and between me and mum and her wheelie shopping trolley [which thank god she brought!!!] the wheelie shopping trolley really helped but I definitely wish we had thought to park closer!!! 

So yeah that's my top tips for shopping Abakhans fill a bag sale! I really hope they come back to Hanley for another! 

Much Love

Frankie

xxx